Exploring AI Tools & New Features
From Wireframe to High Fidelity with AI
I used Claude as a design partner to design a banking app, from framing the problem to refining the final screens.
Setting the Foundations
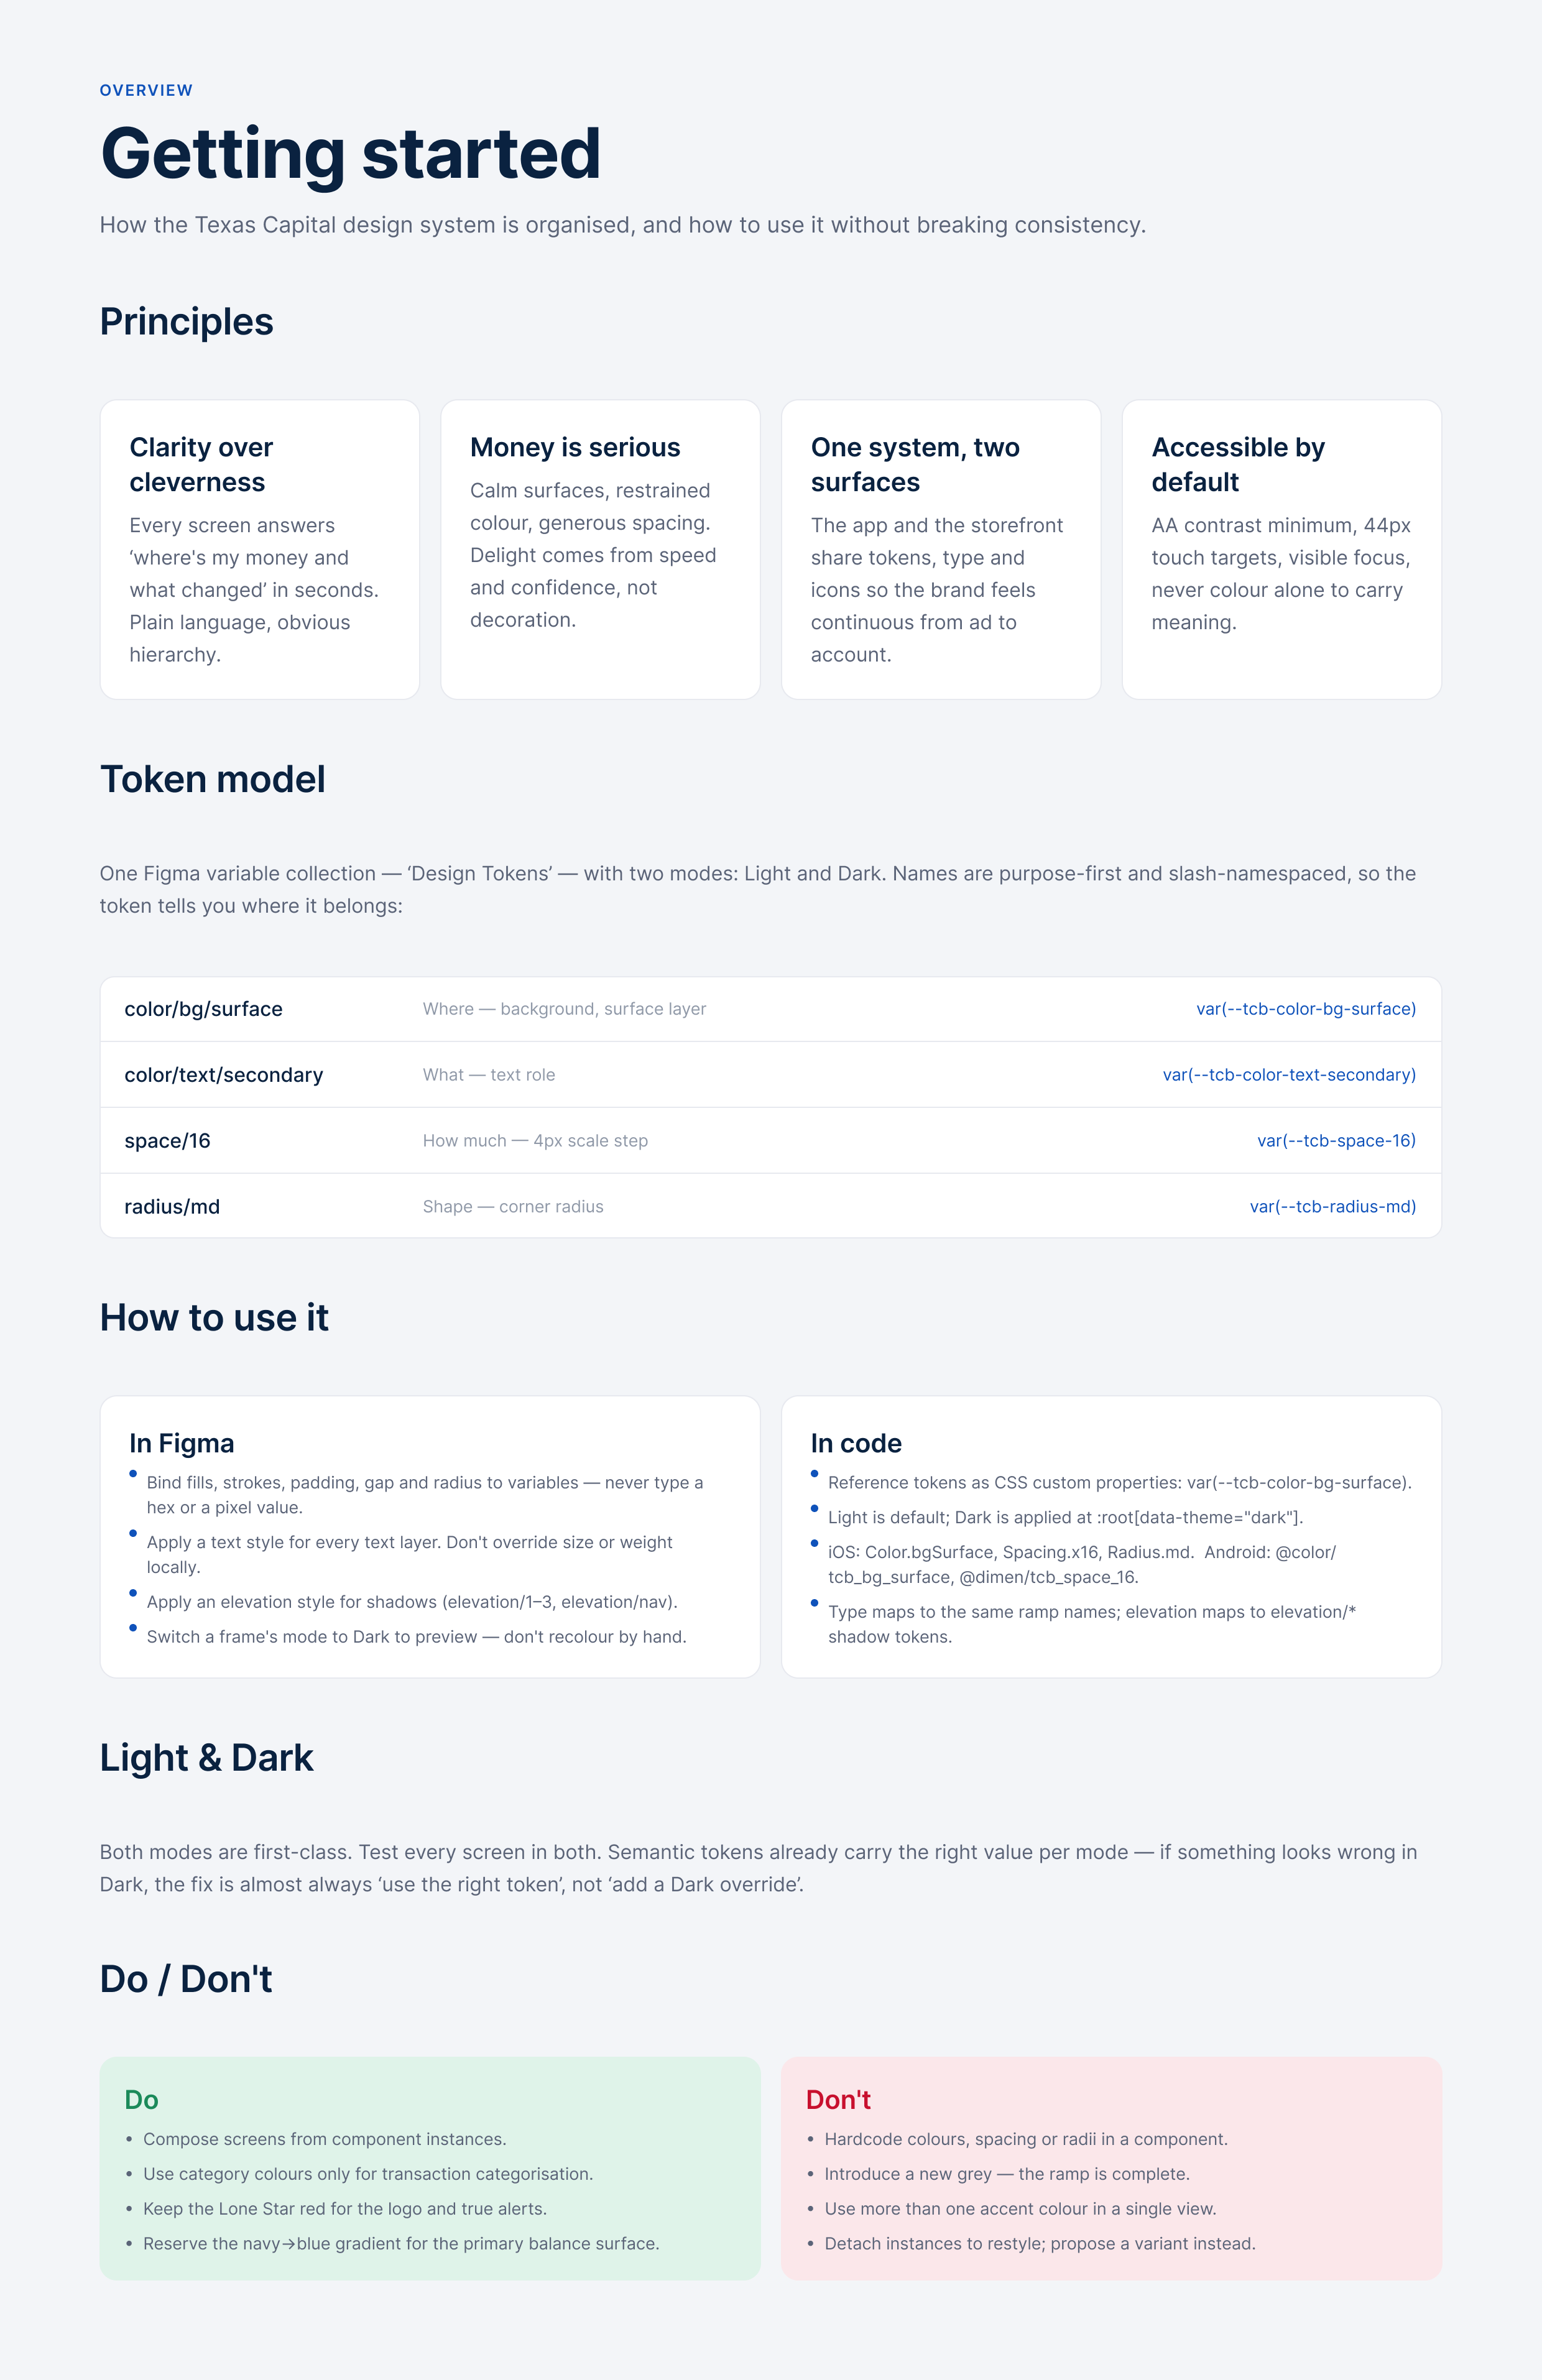
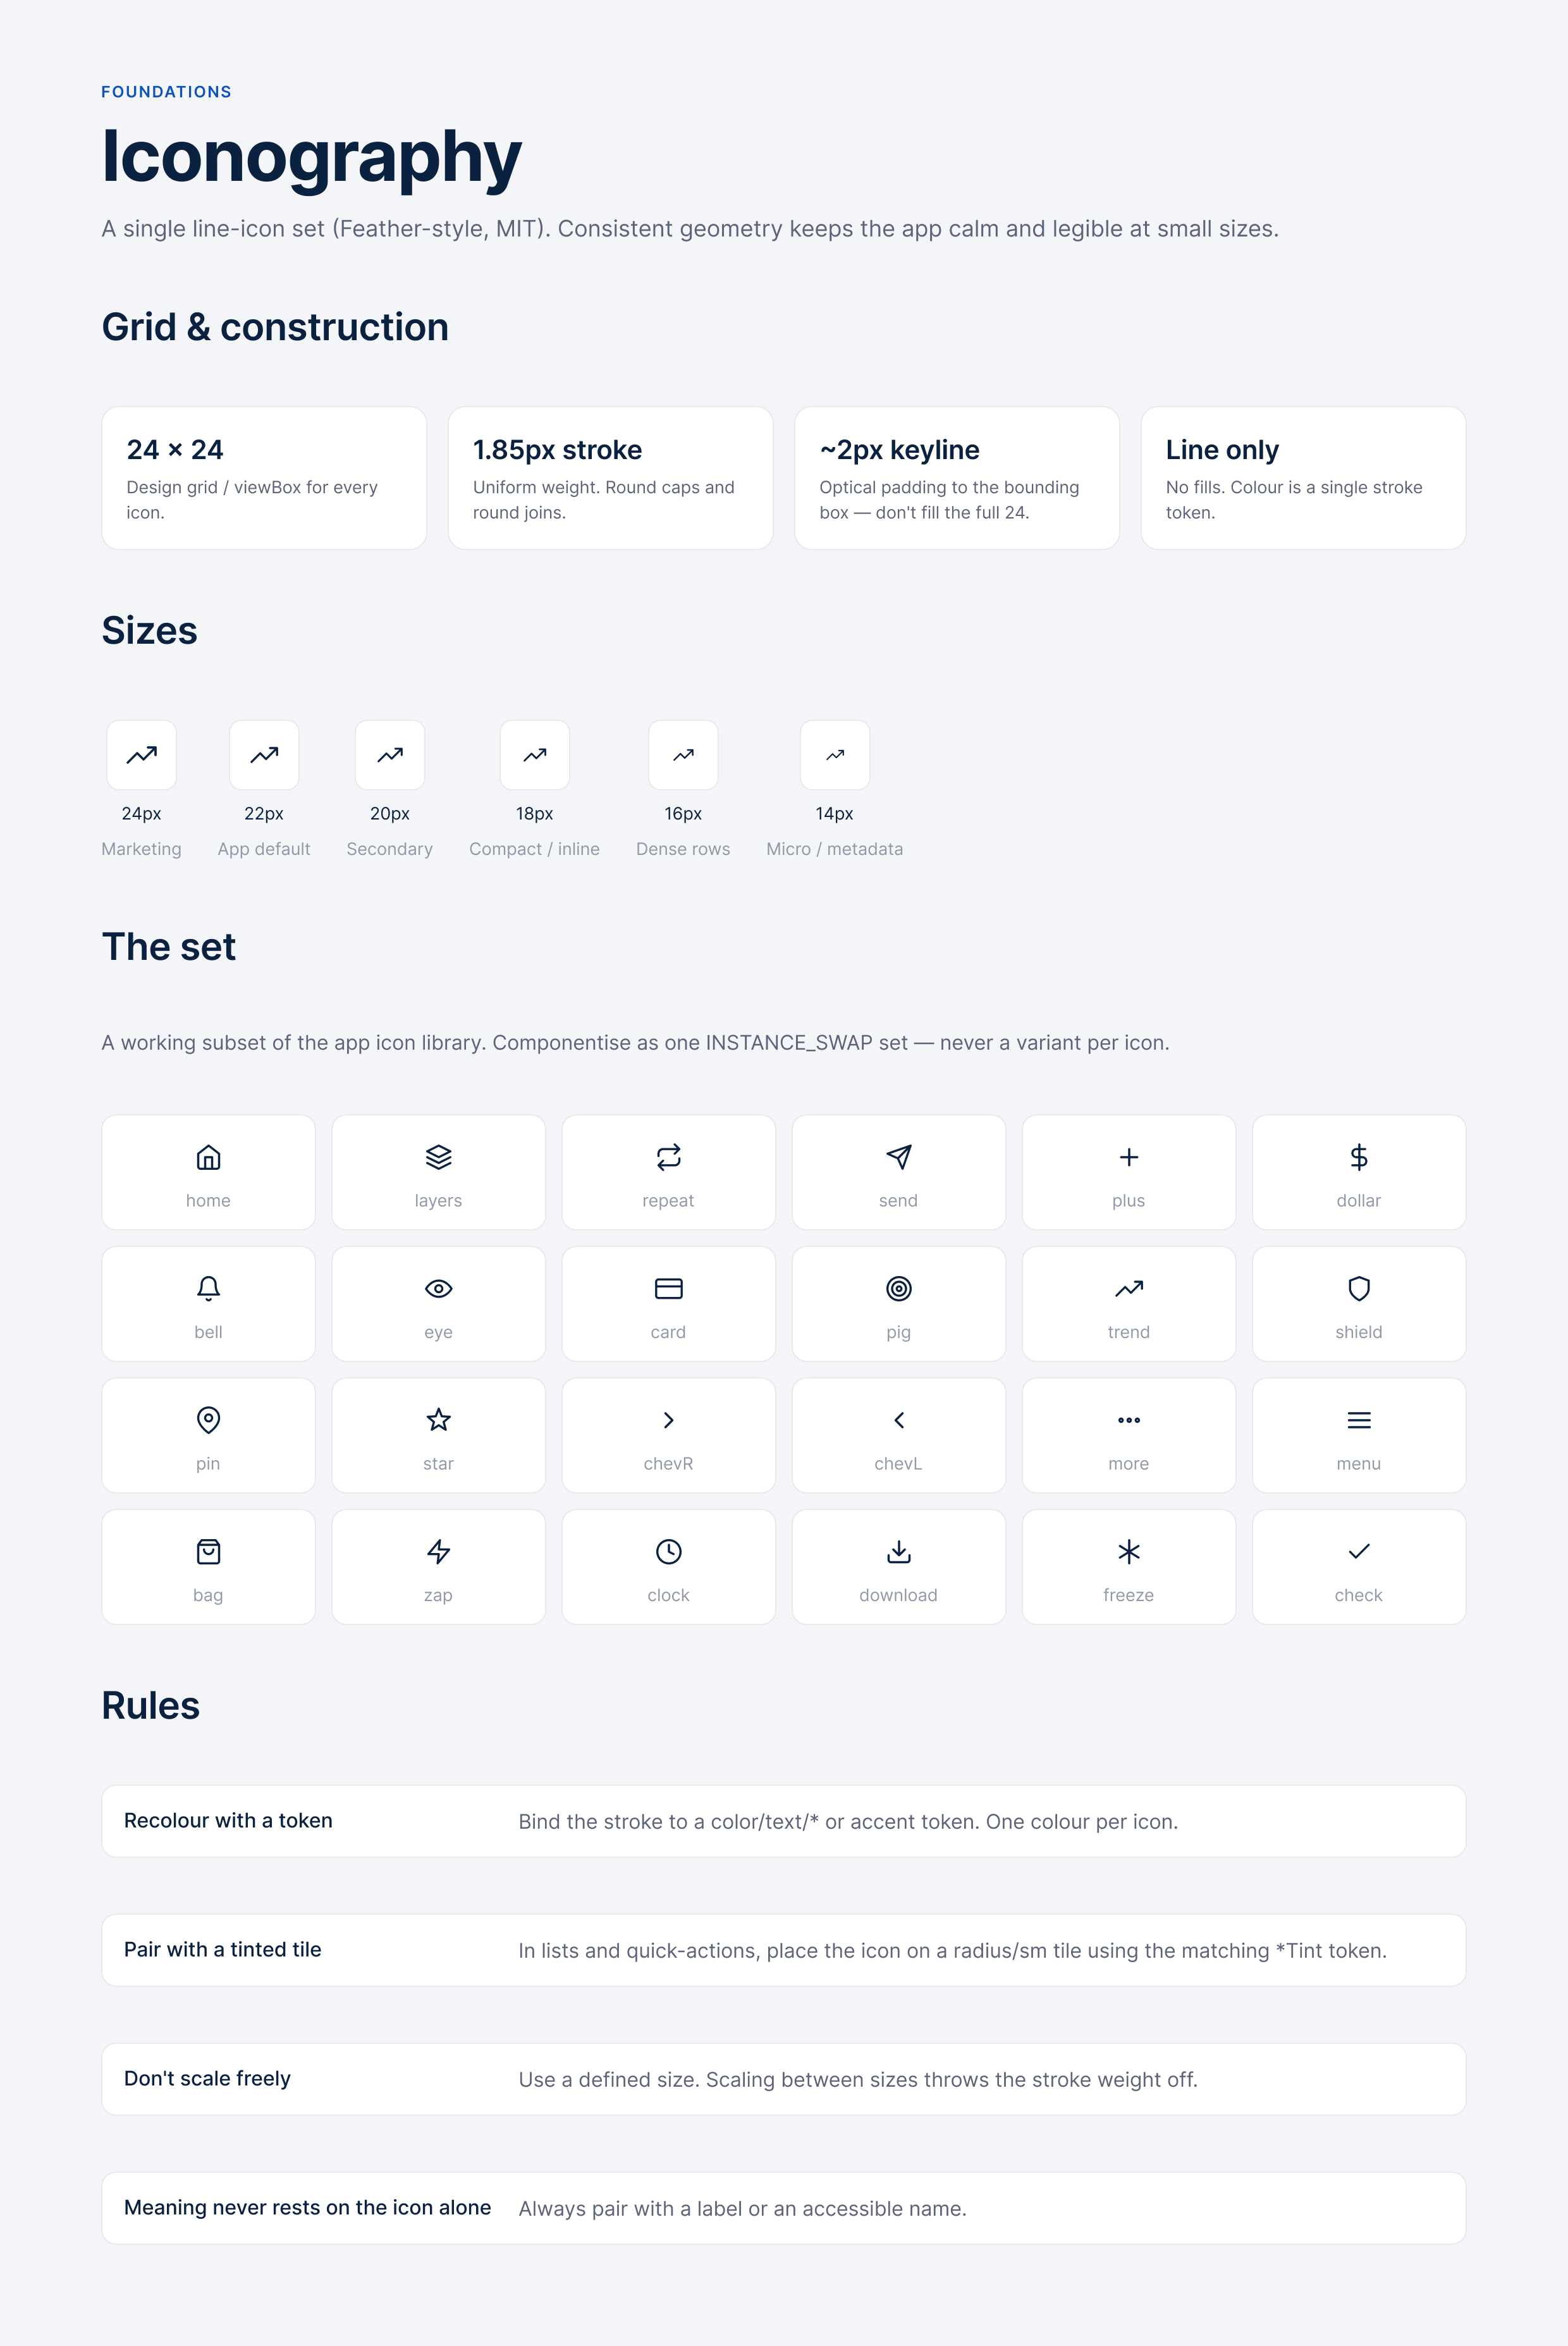
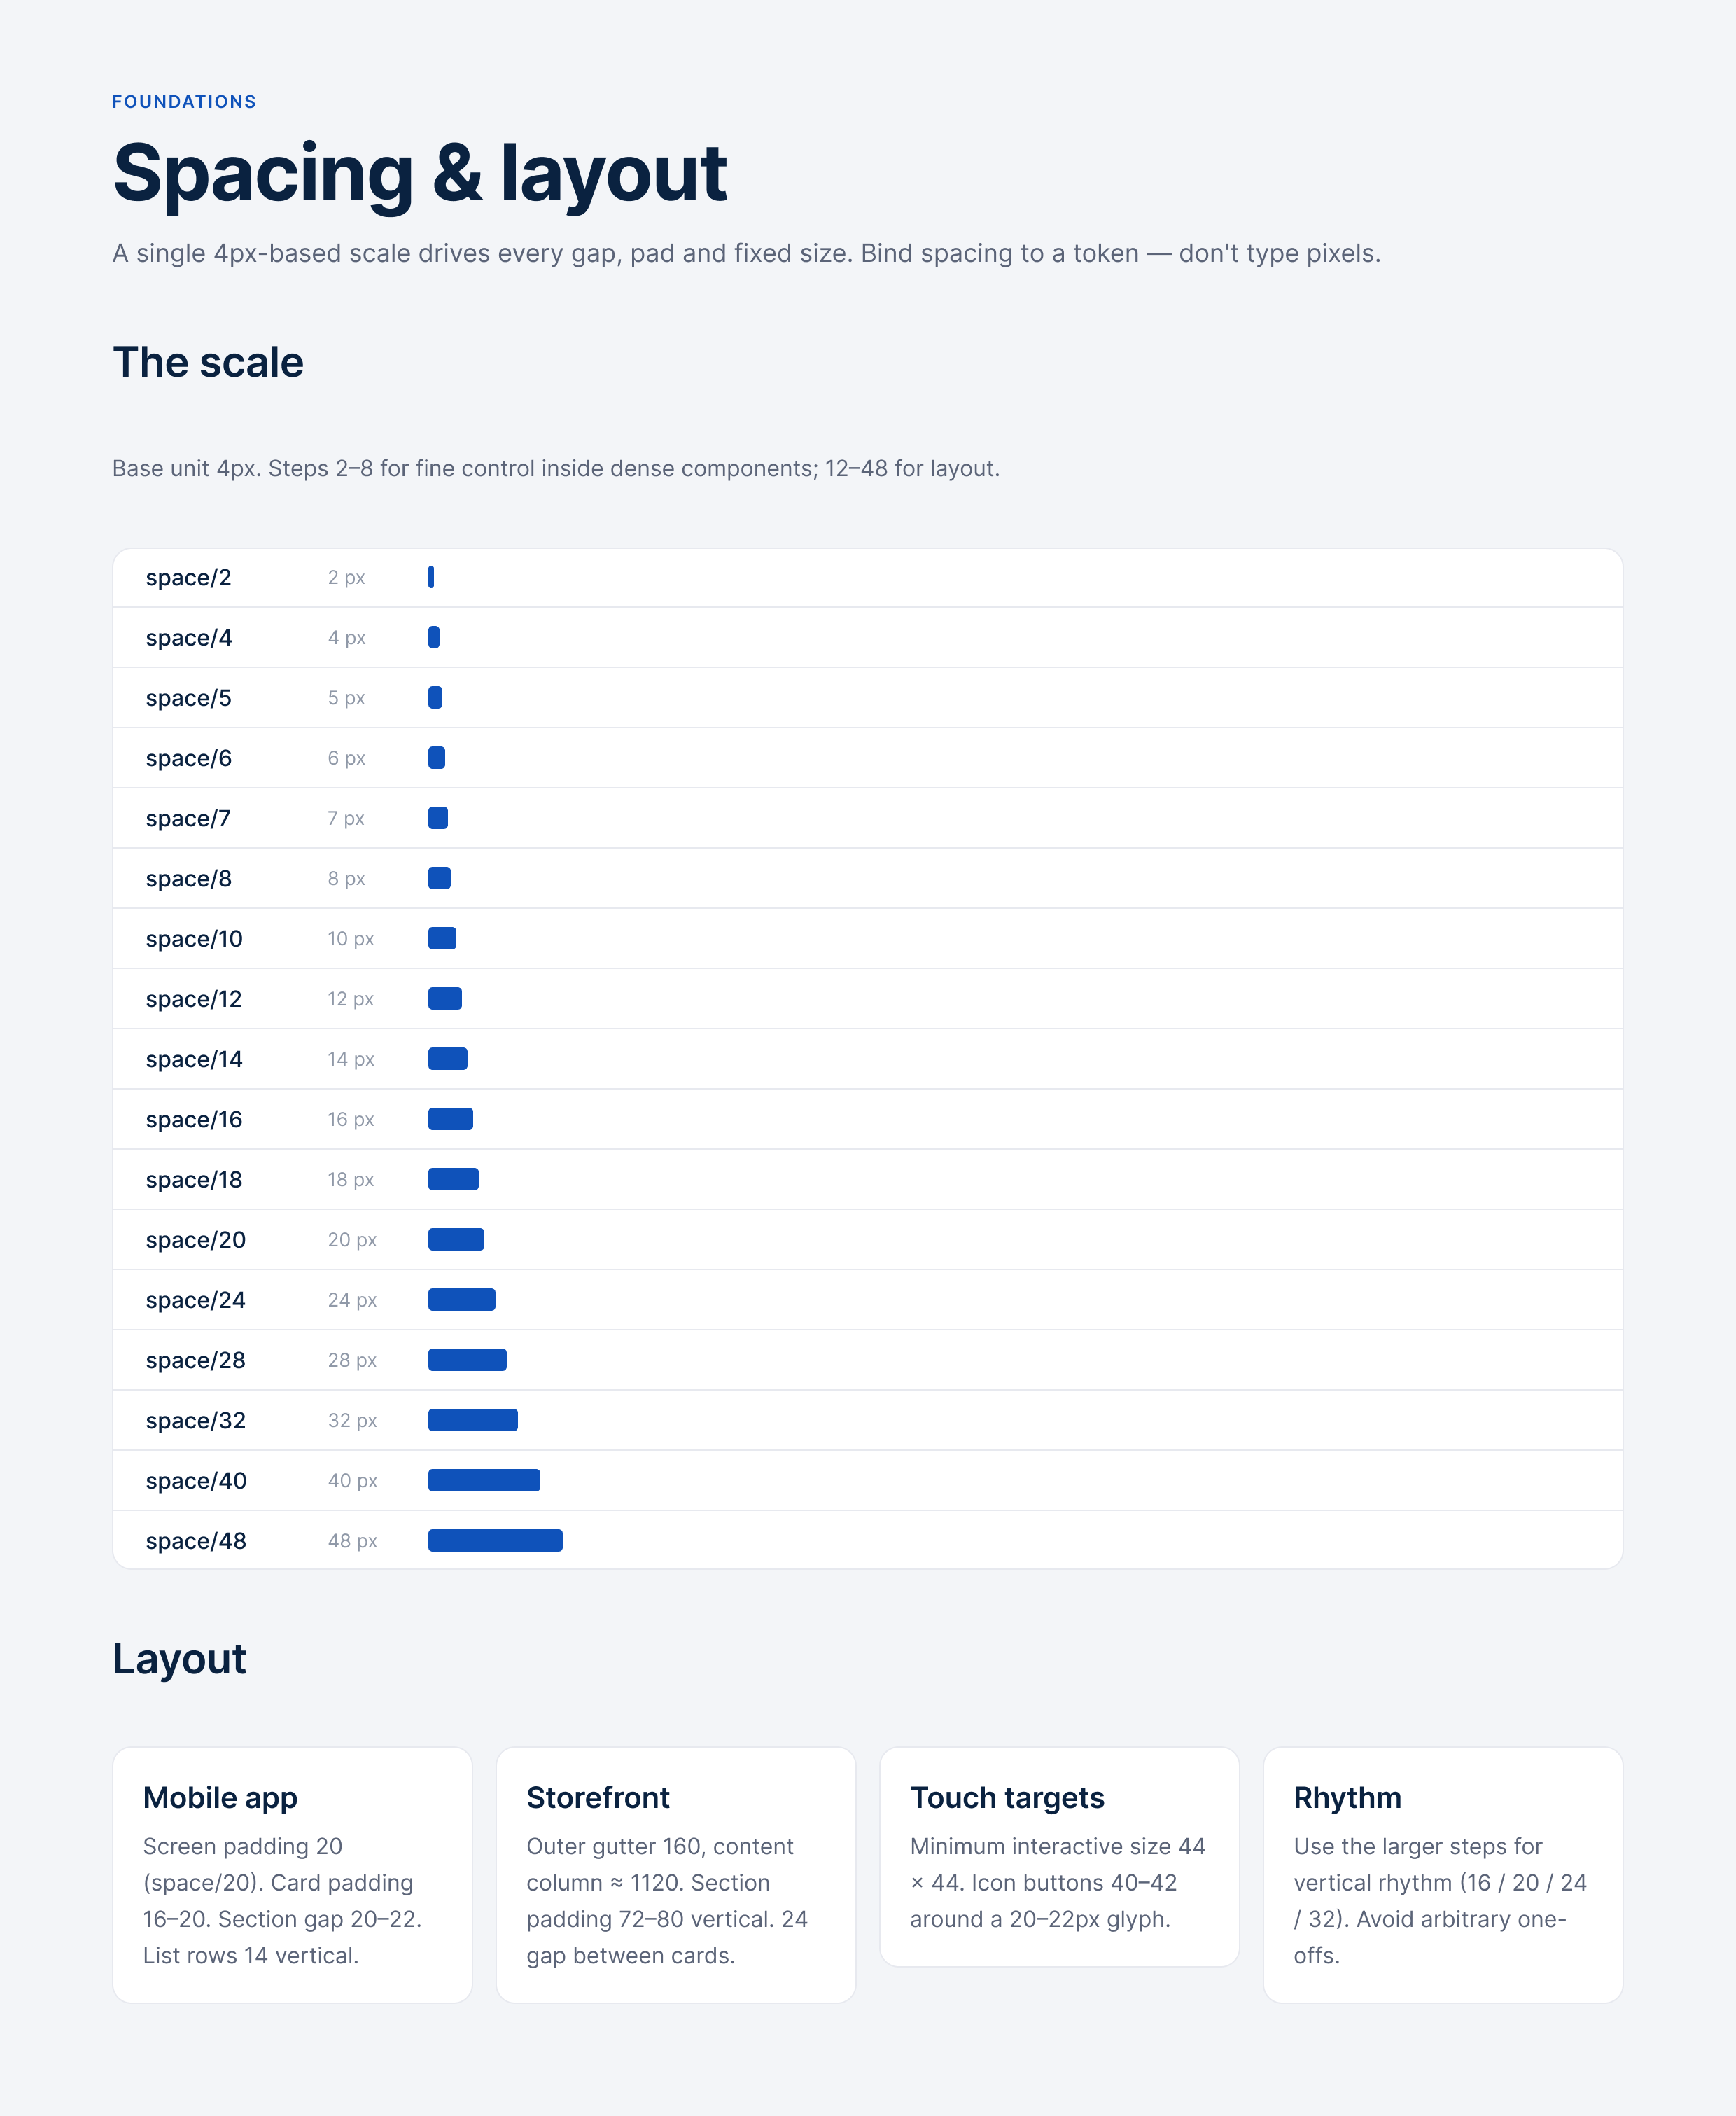
Before designing any screens, I worked with Claude to set up the foundations: semantic color tokens with light and dark modes, a type ramp, a spacing scale, radius and elevation steps, and an icon set. Every screen after this binds to these tokens, so AI-generated work stays on brand.
Define tokens for color, type, spacing, radius, elevation, and icons, with rules for how to use them.
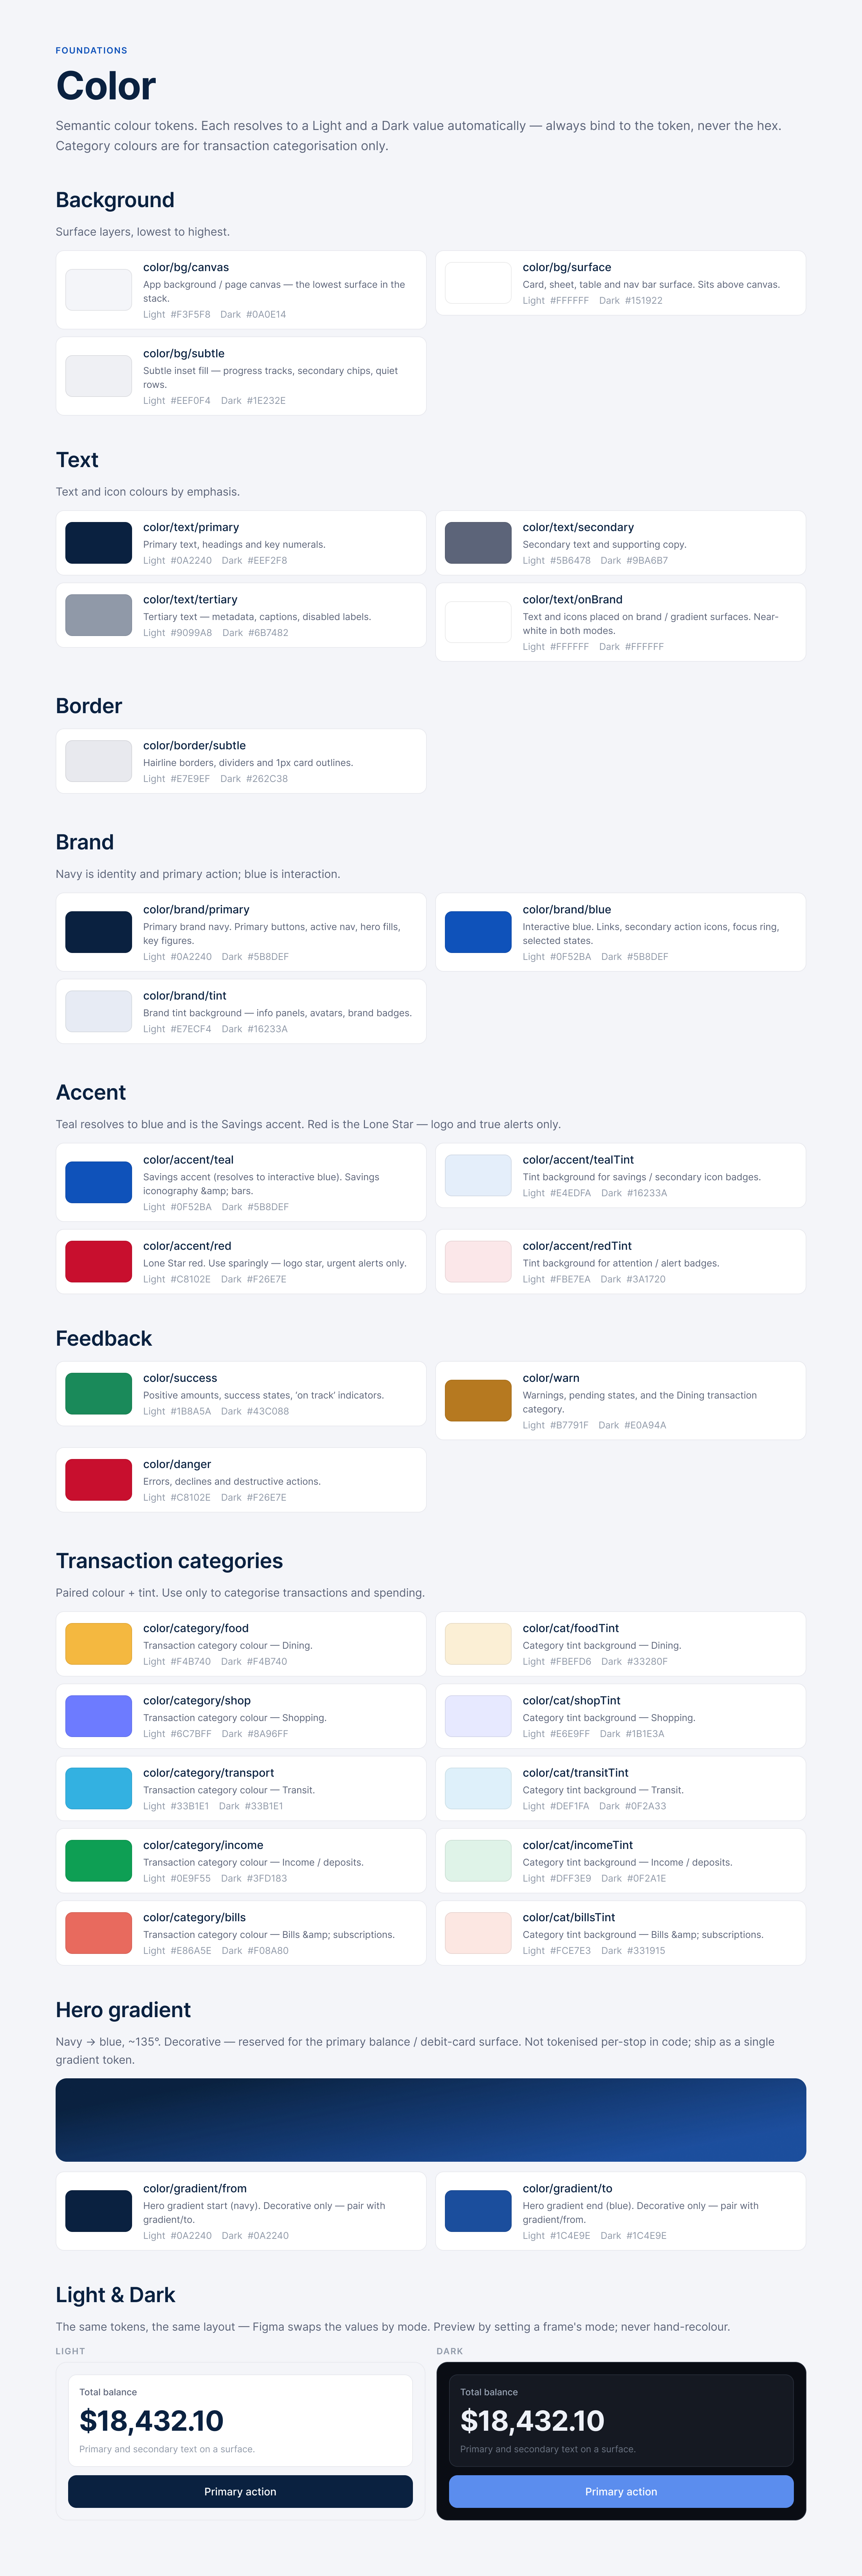
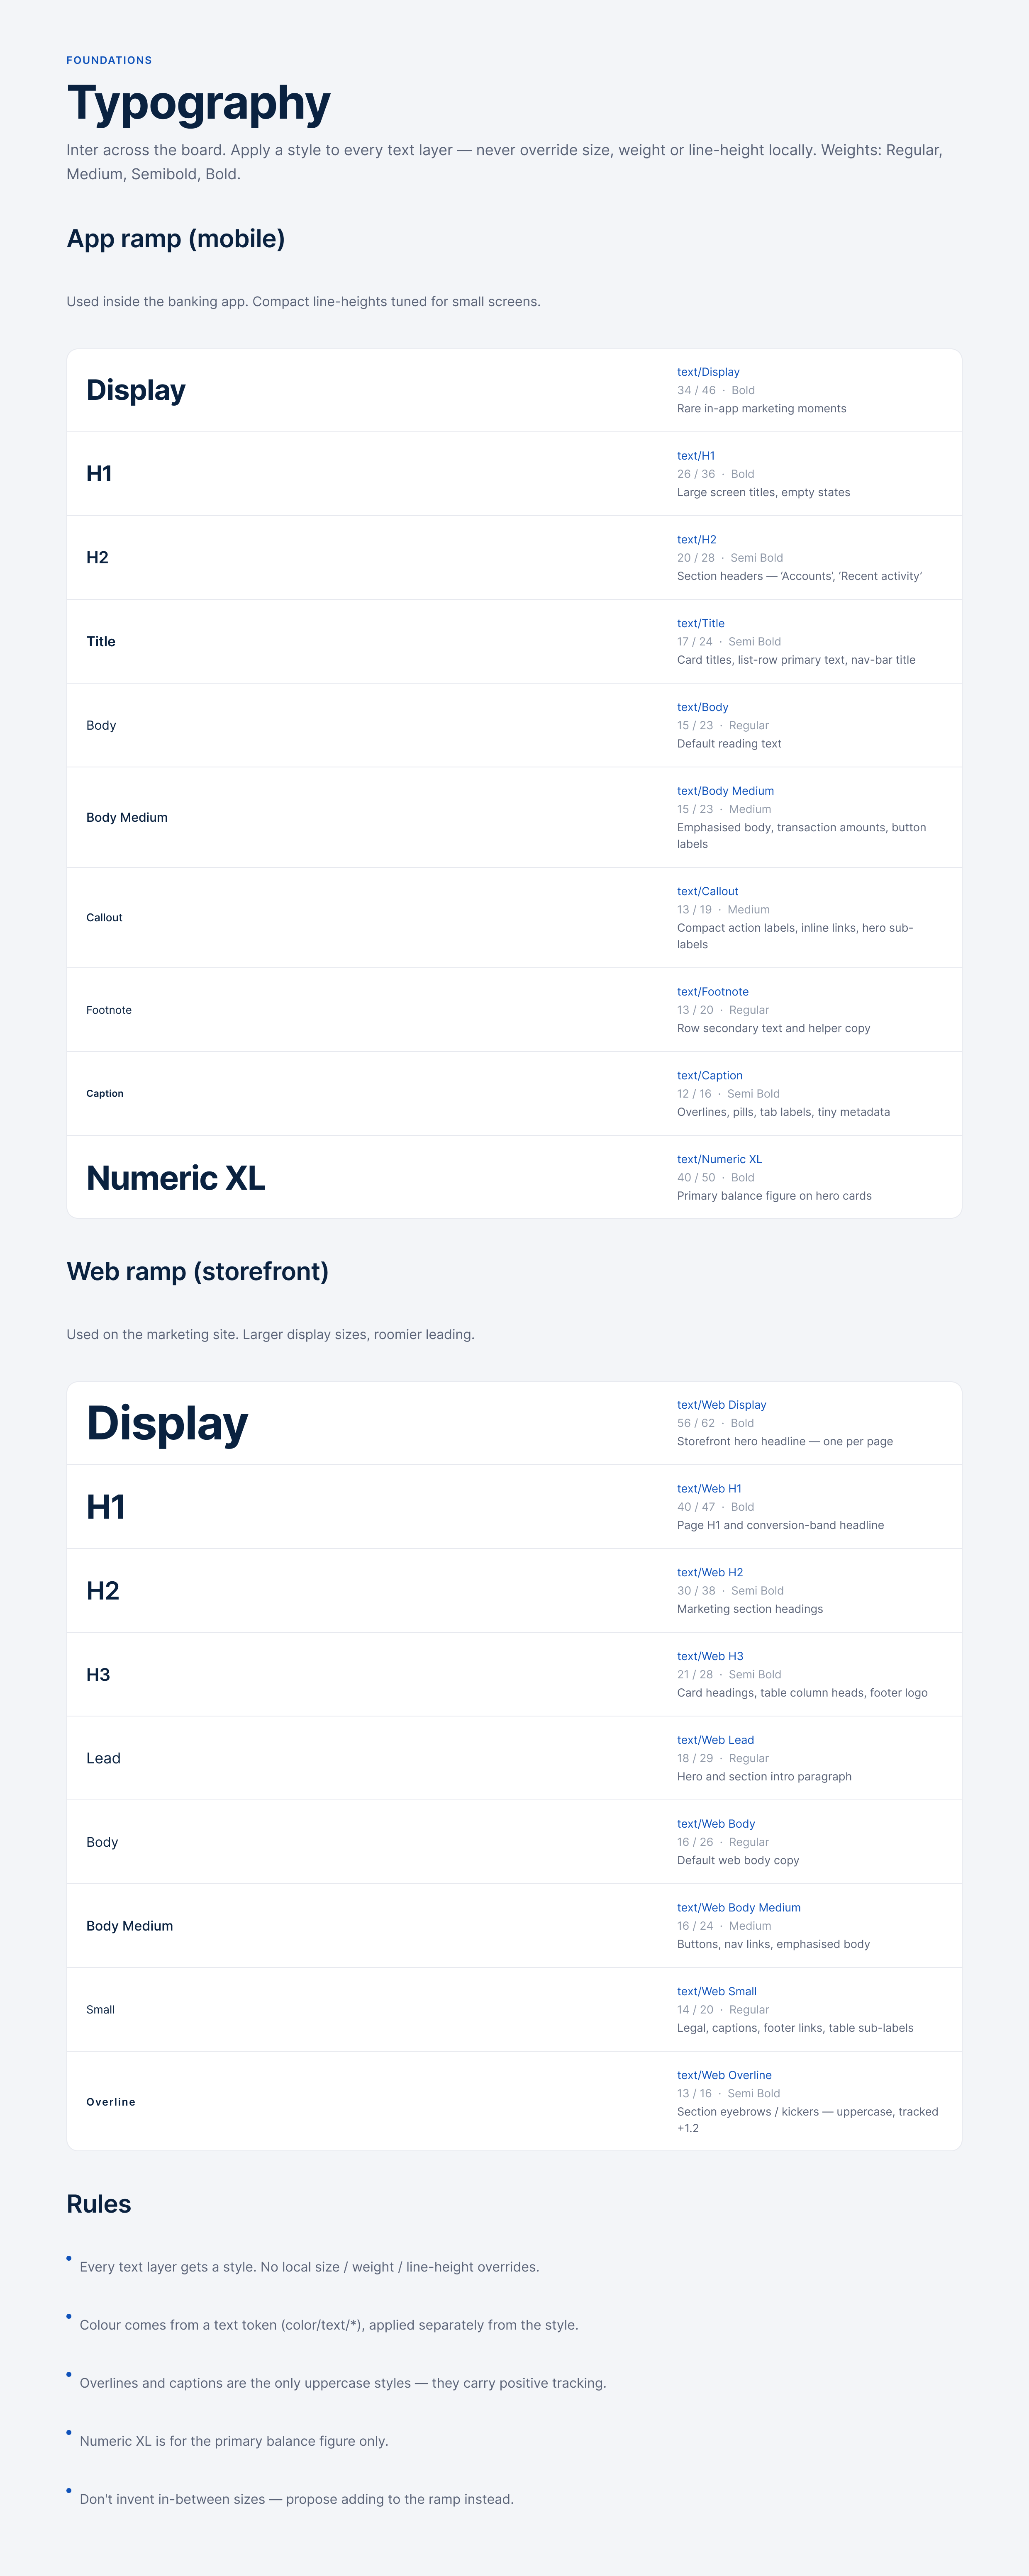
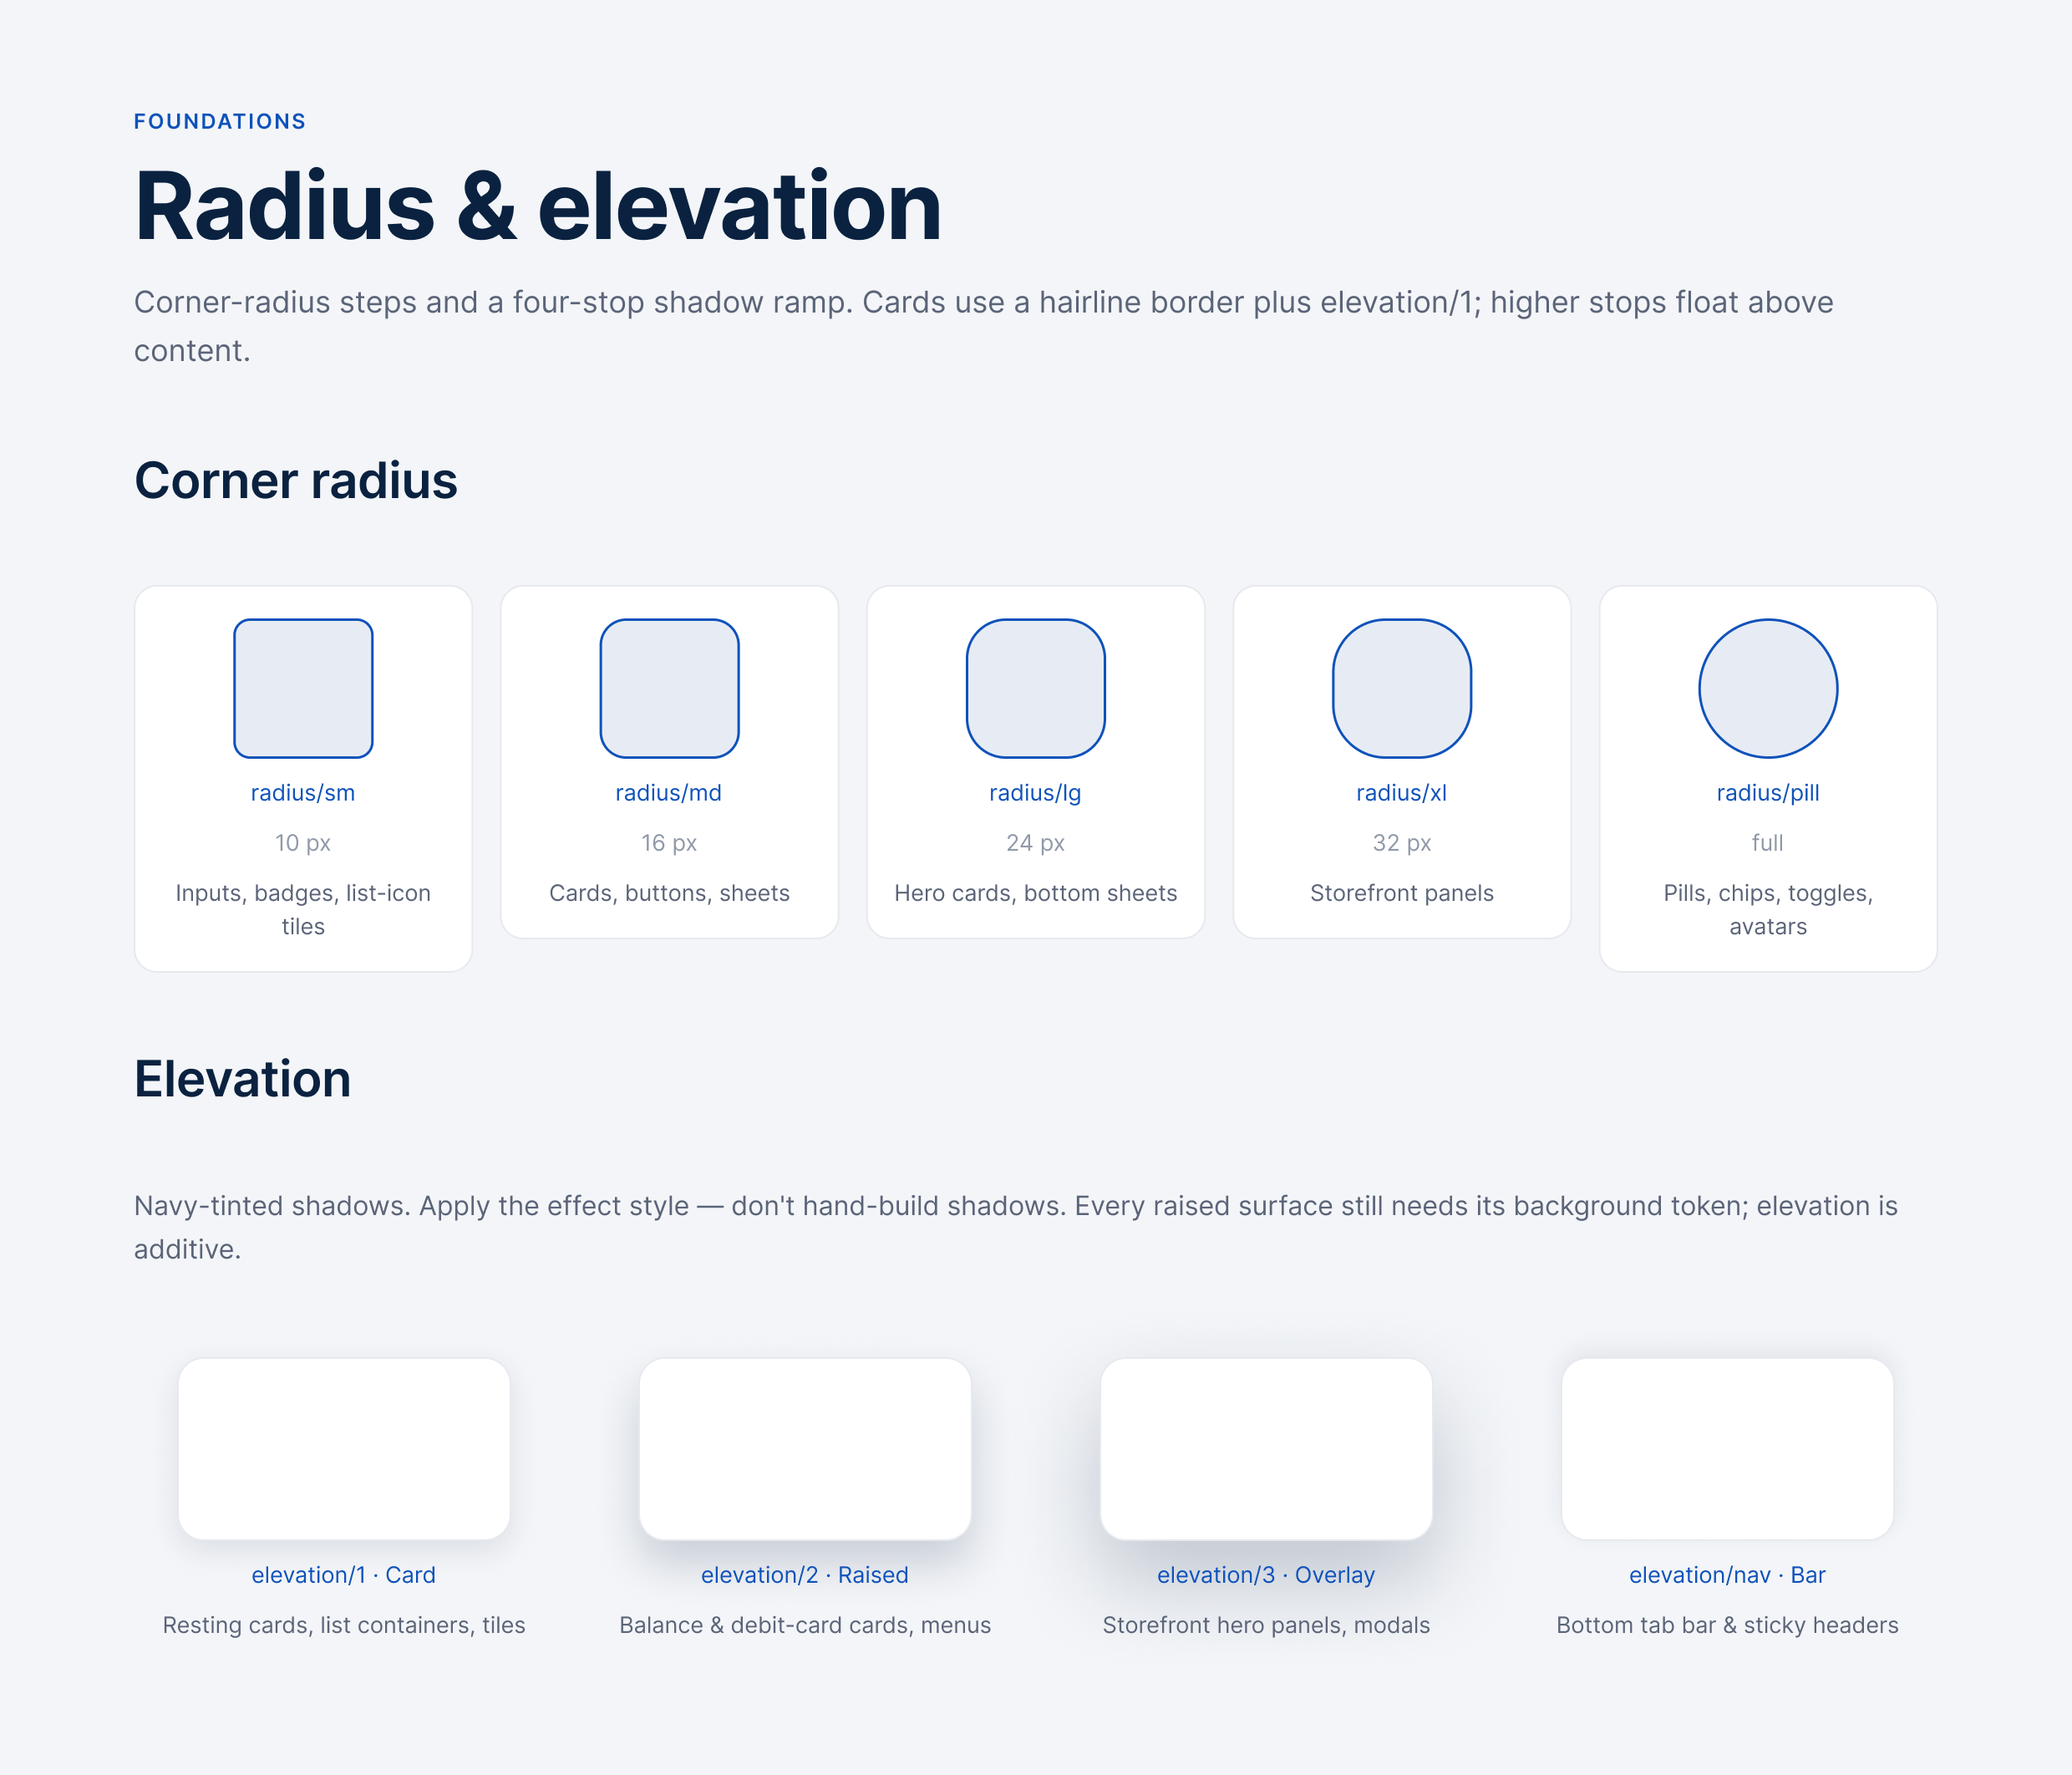
The rules AI builds every screen from.
My AI-Assisted Workflow
1. Frame the problem
I start by giving Claude the user, the goal, and the constraints. We turn that into a list of key screens and the main user flows, so I know what to design before opening Figma.
2. Wireframe fast
I ask Claude for several layout directions for each screen, such as different content hierarchies and navigation patterns. I compare them, keep the strongest structure, and drop the rest.
The Result
Faster exploration, quicker iteration, and a polished, consistent final design.
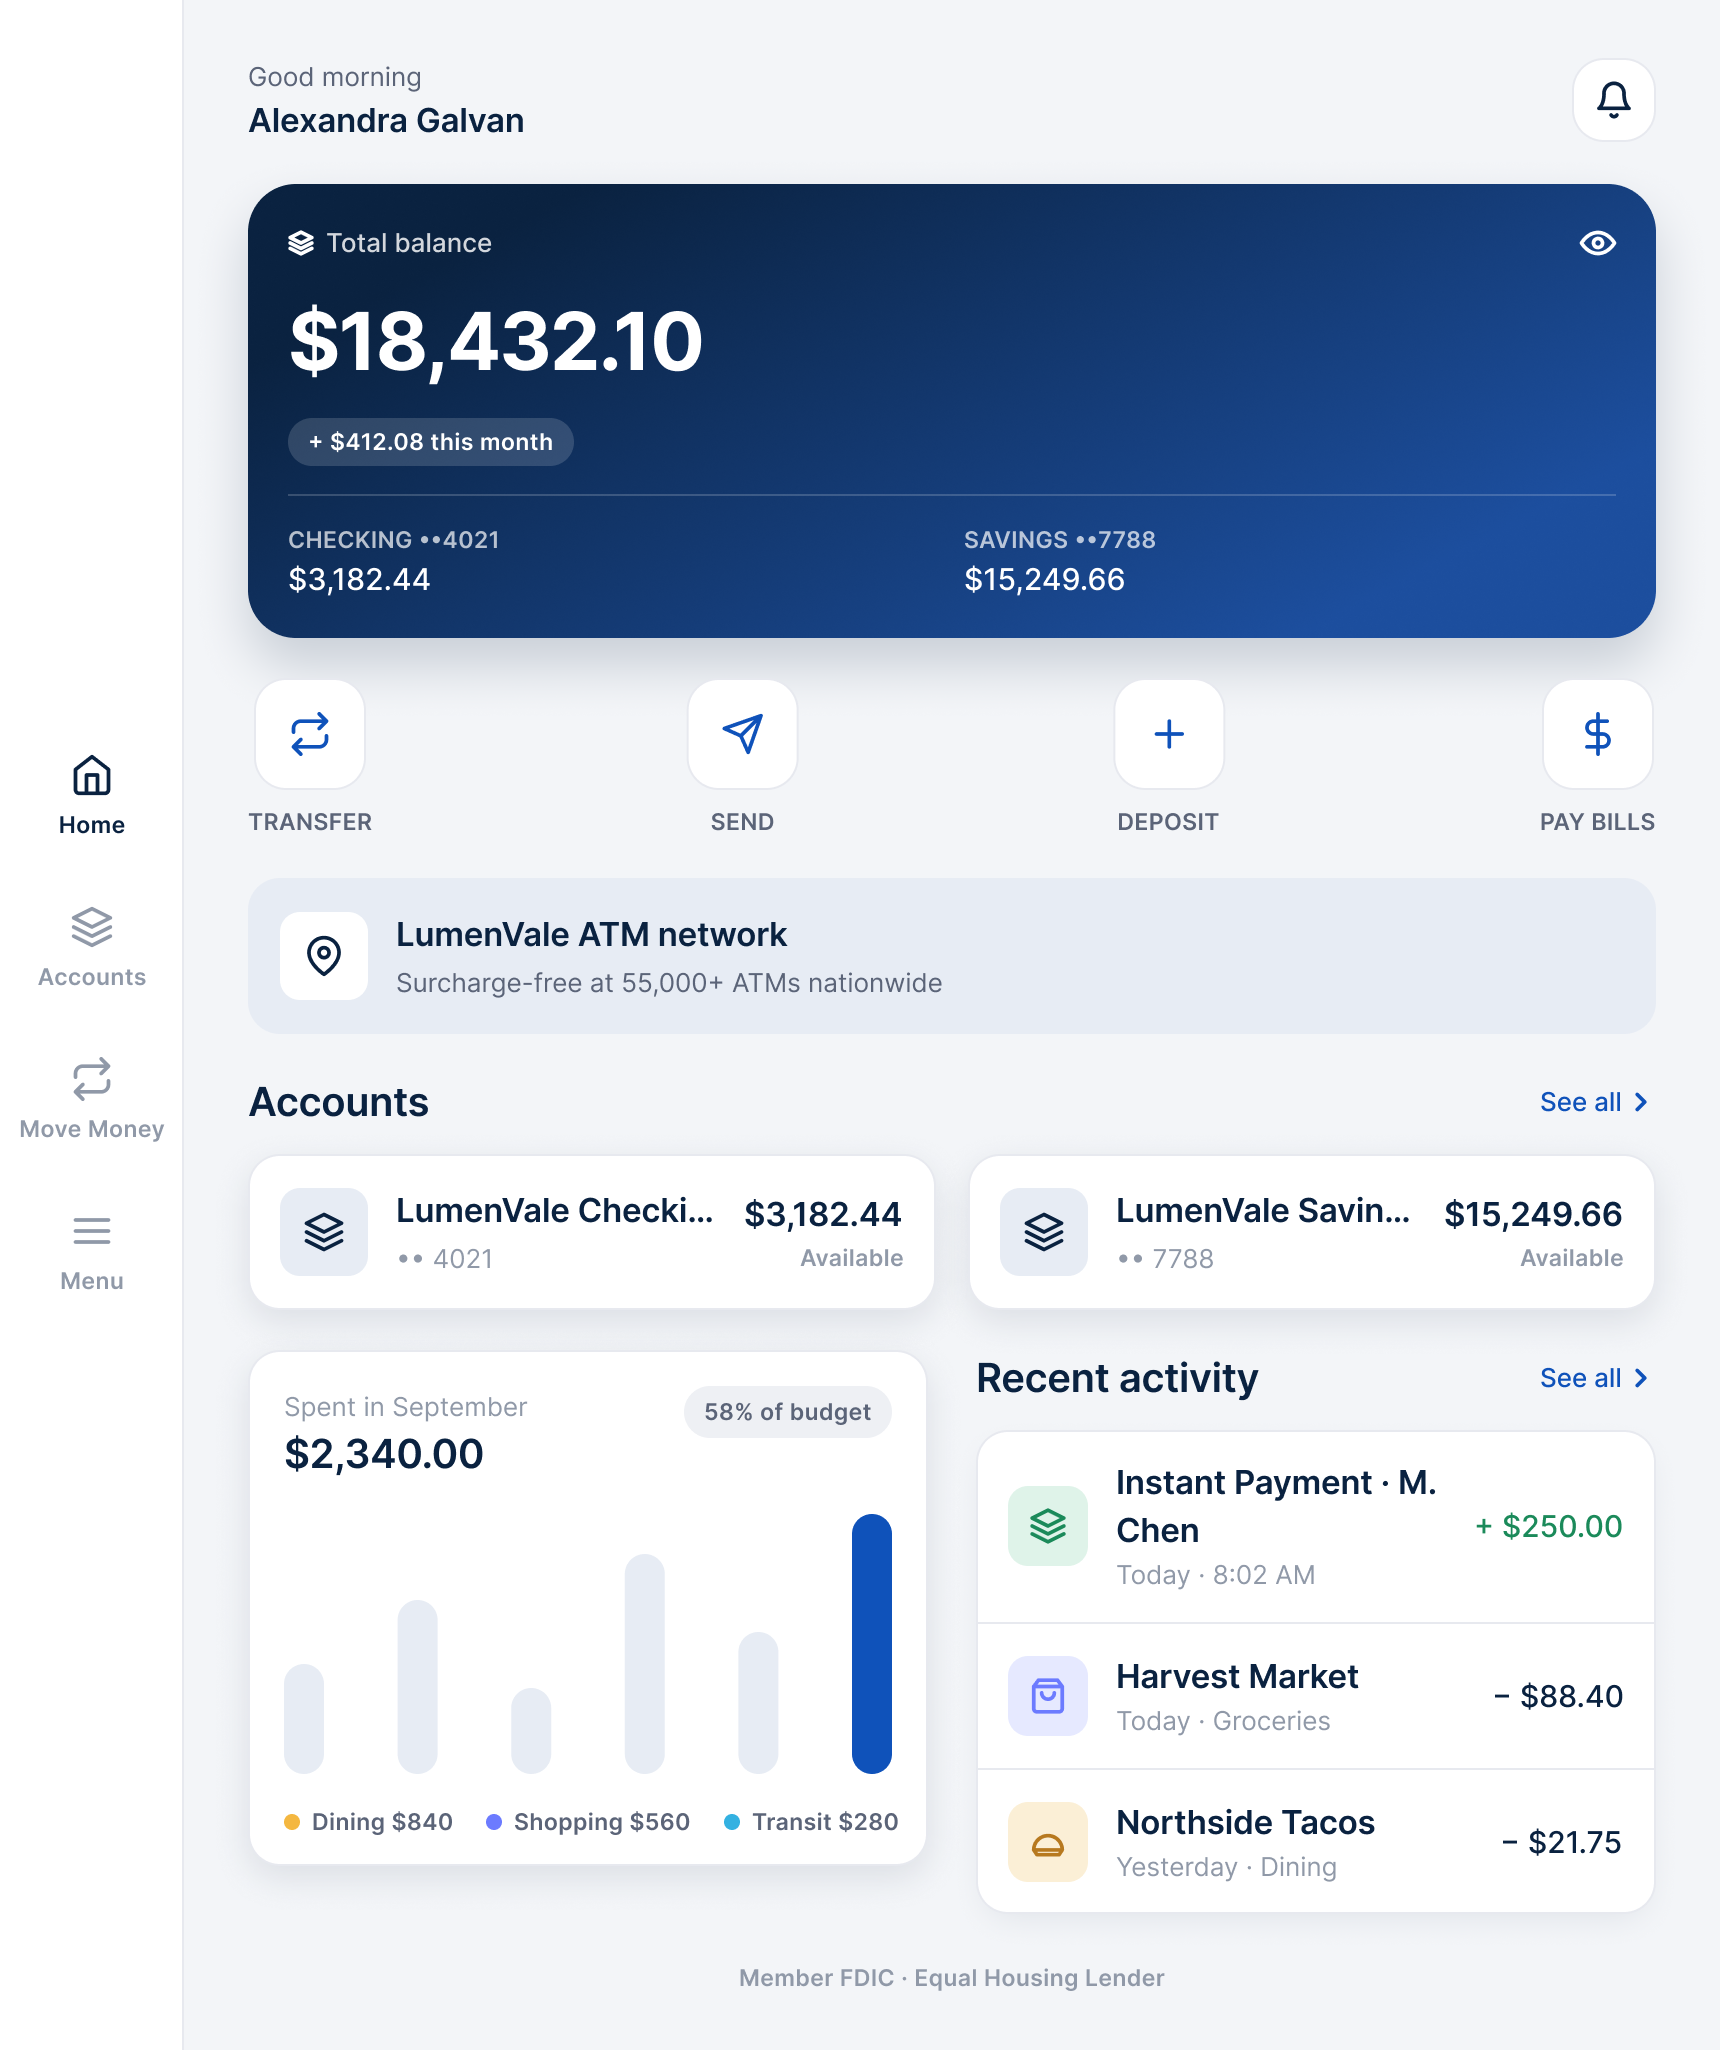
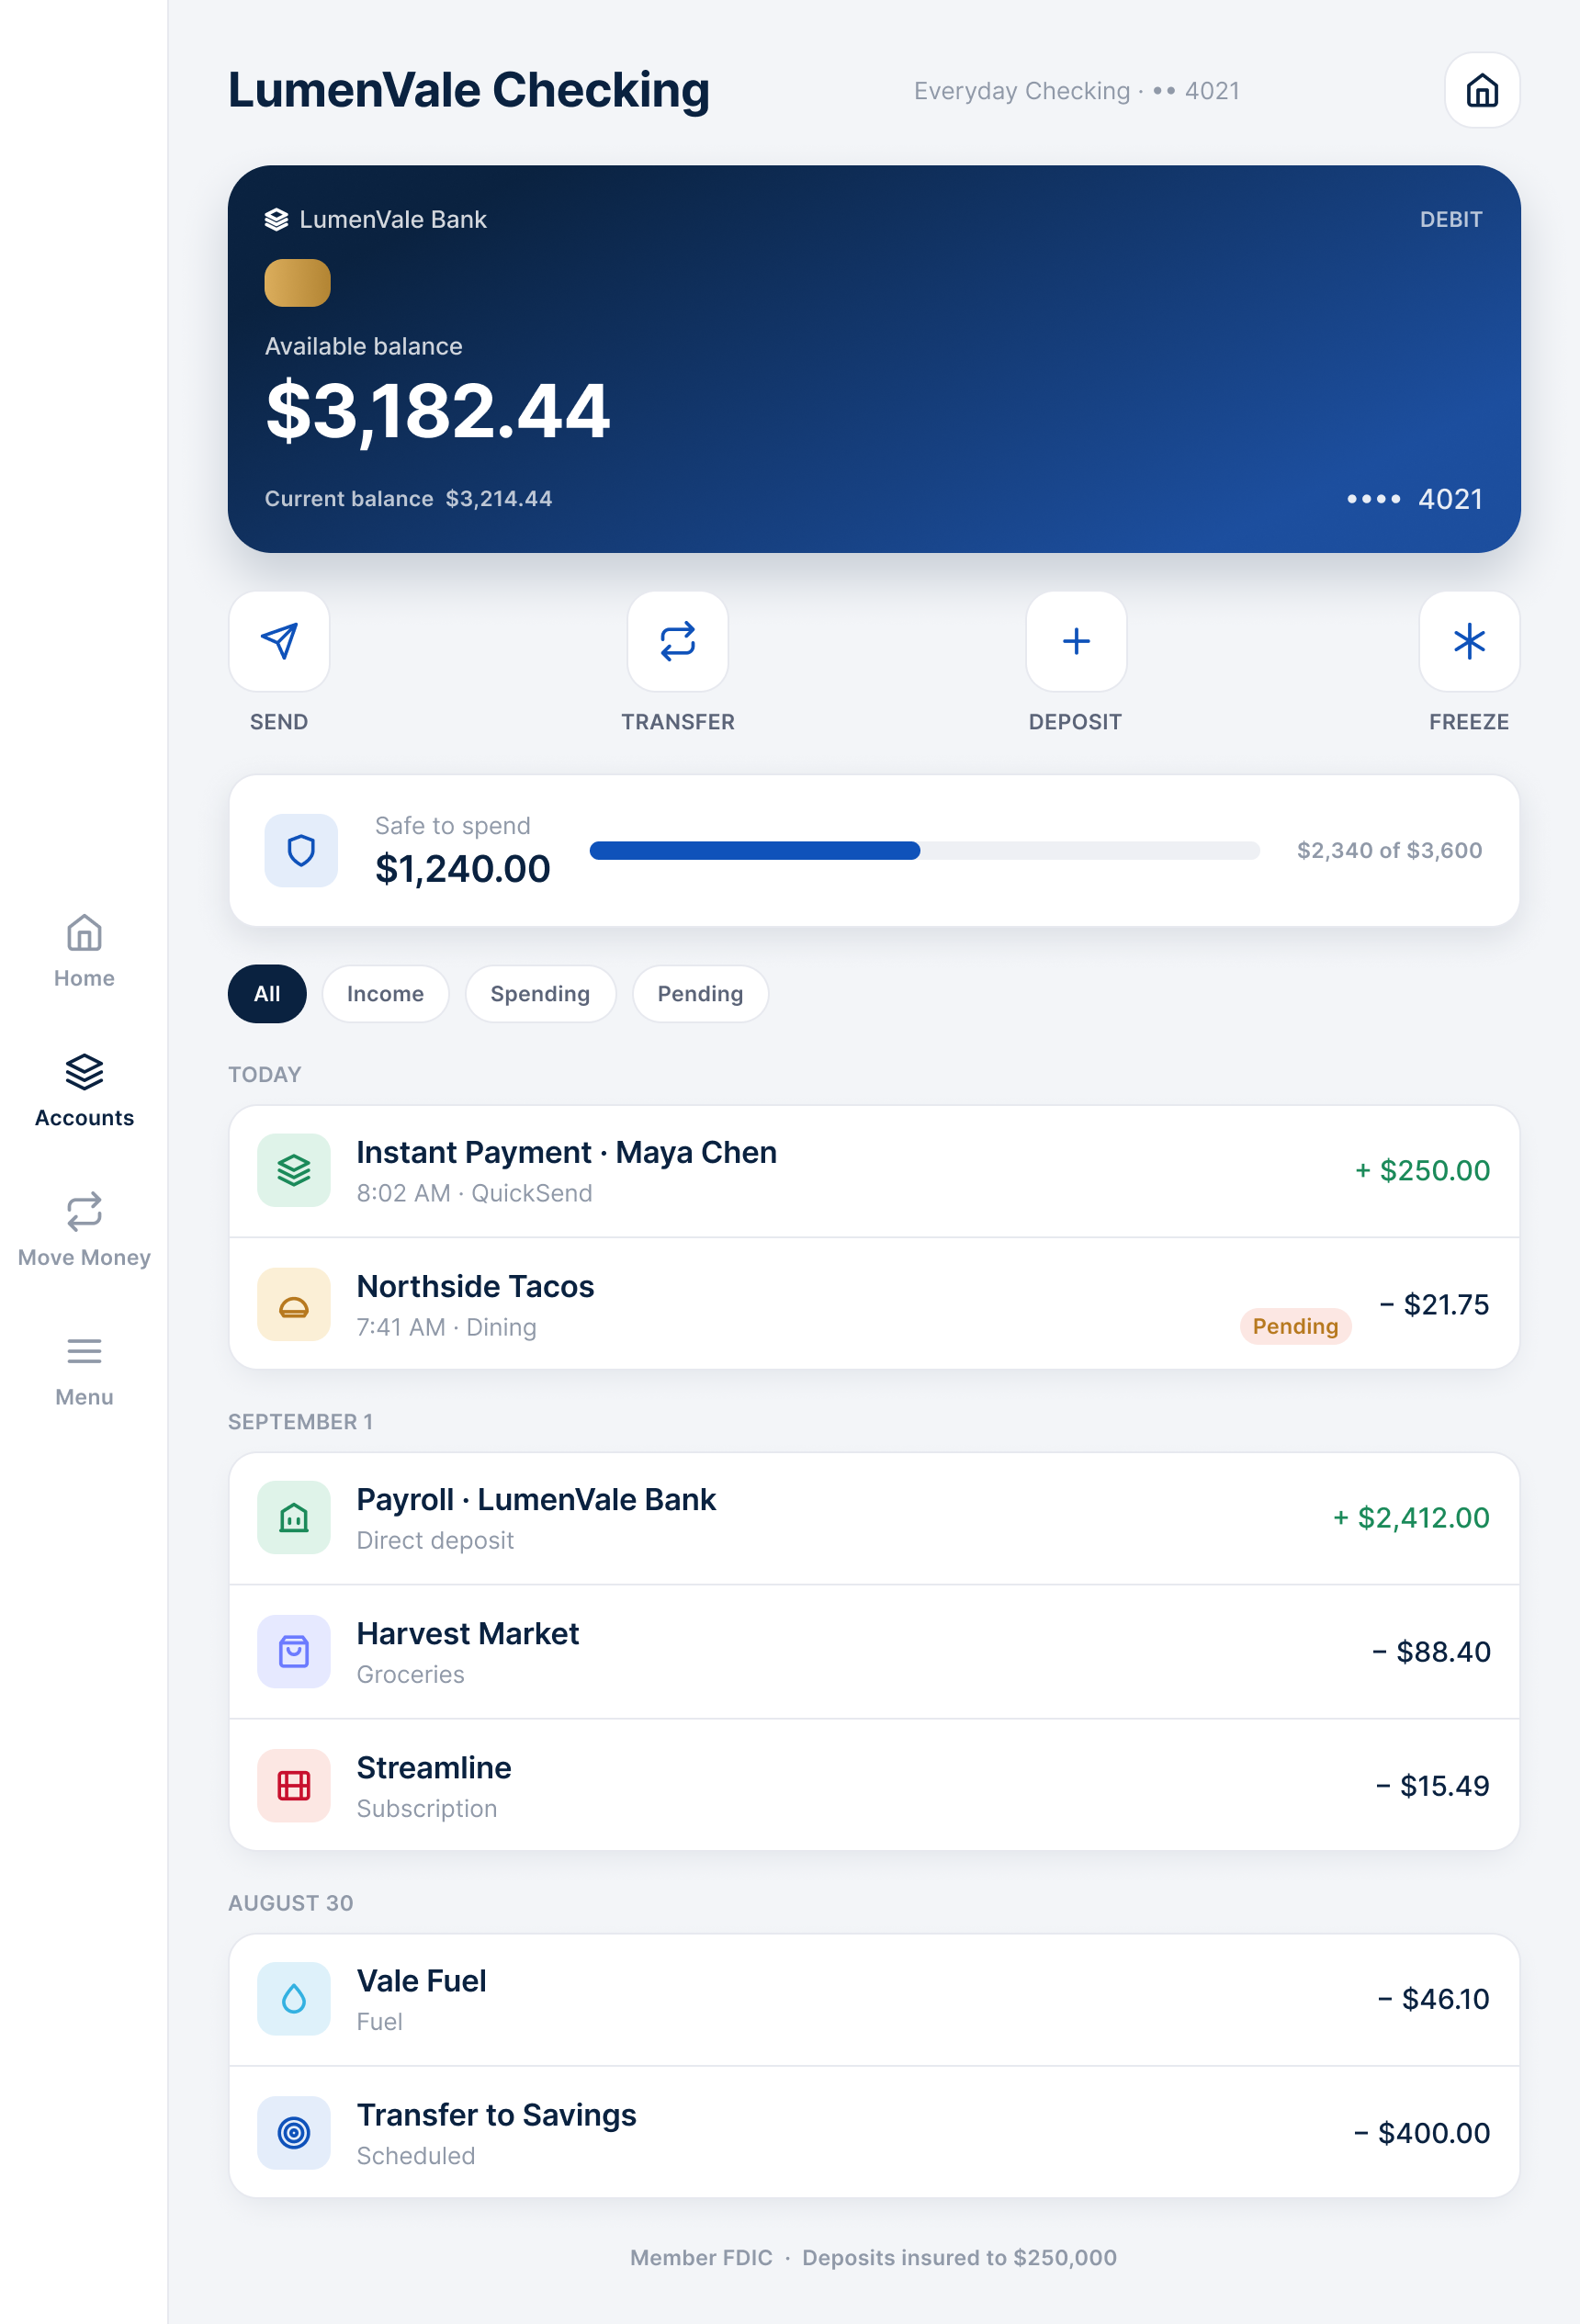
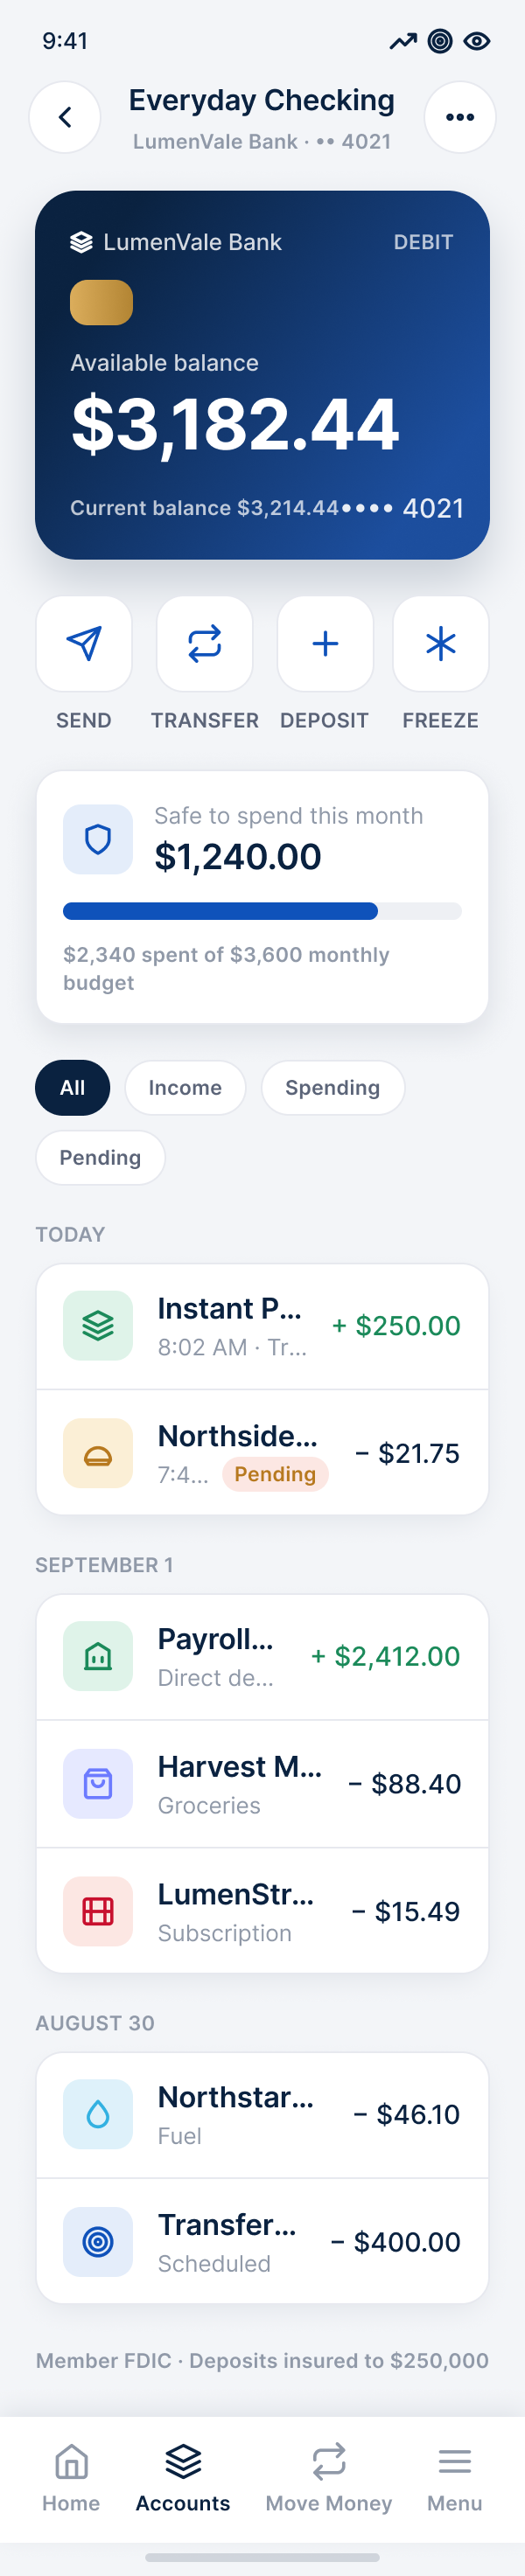
App Screens


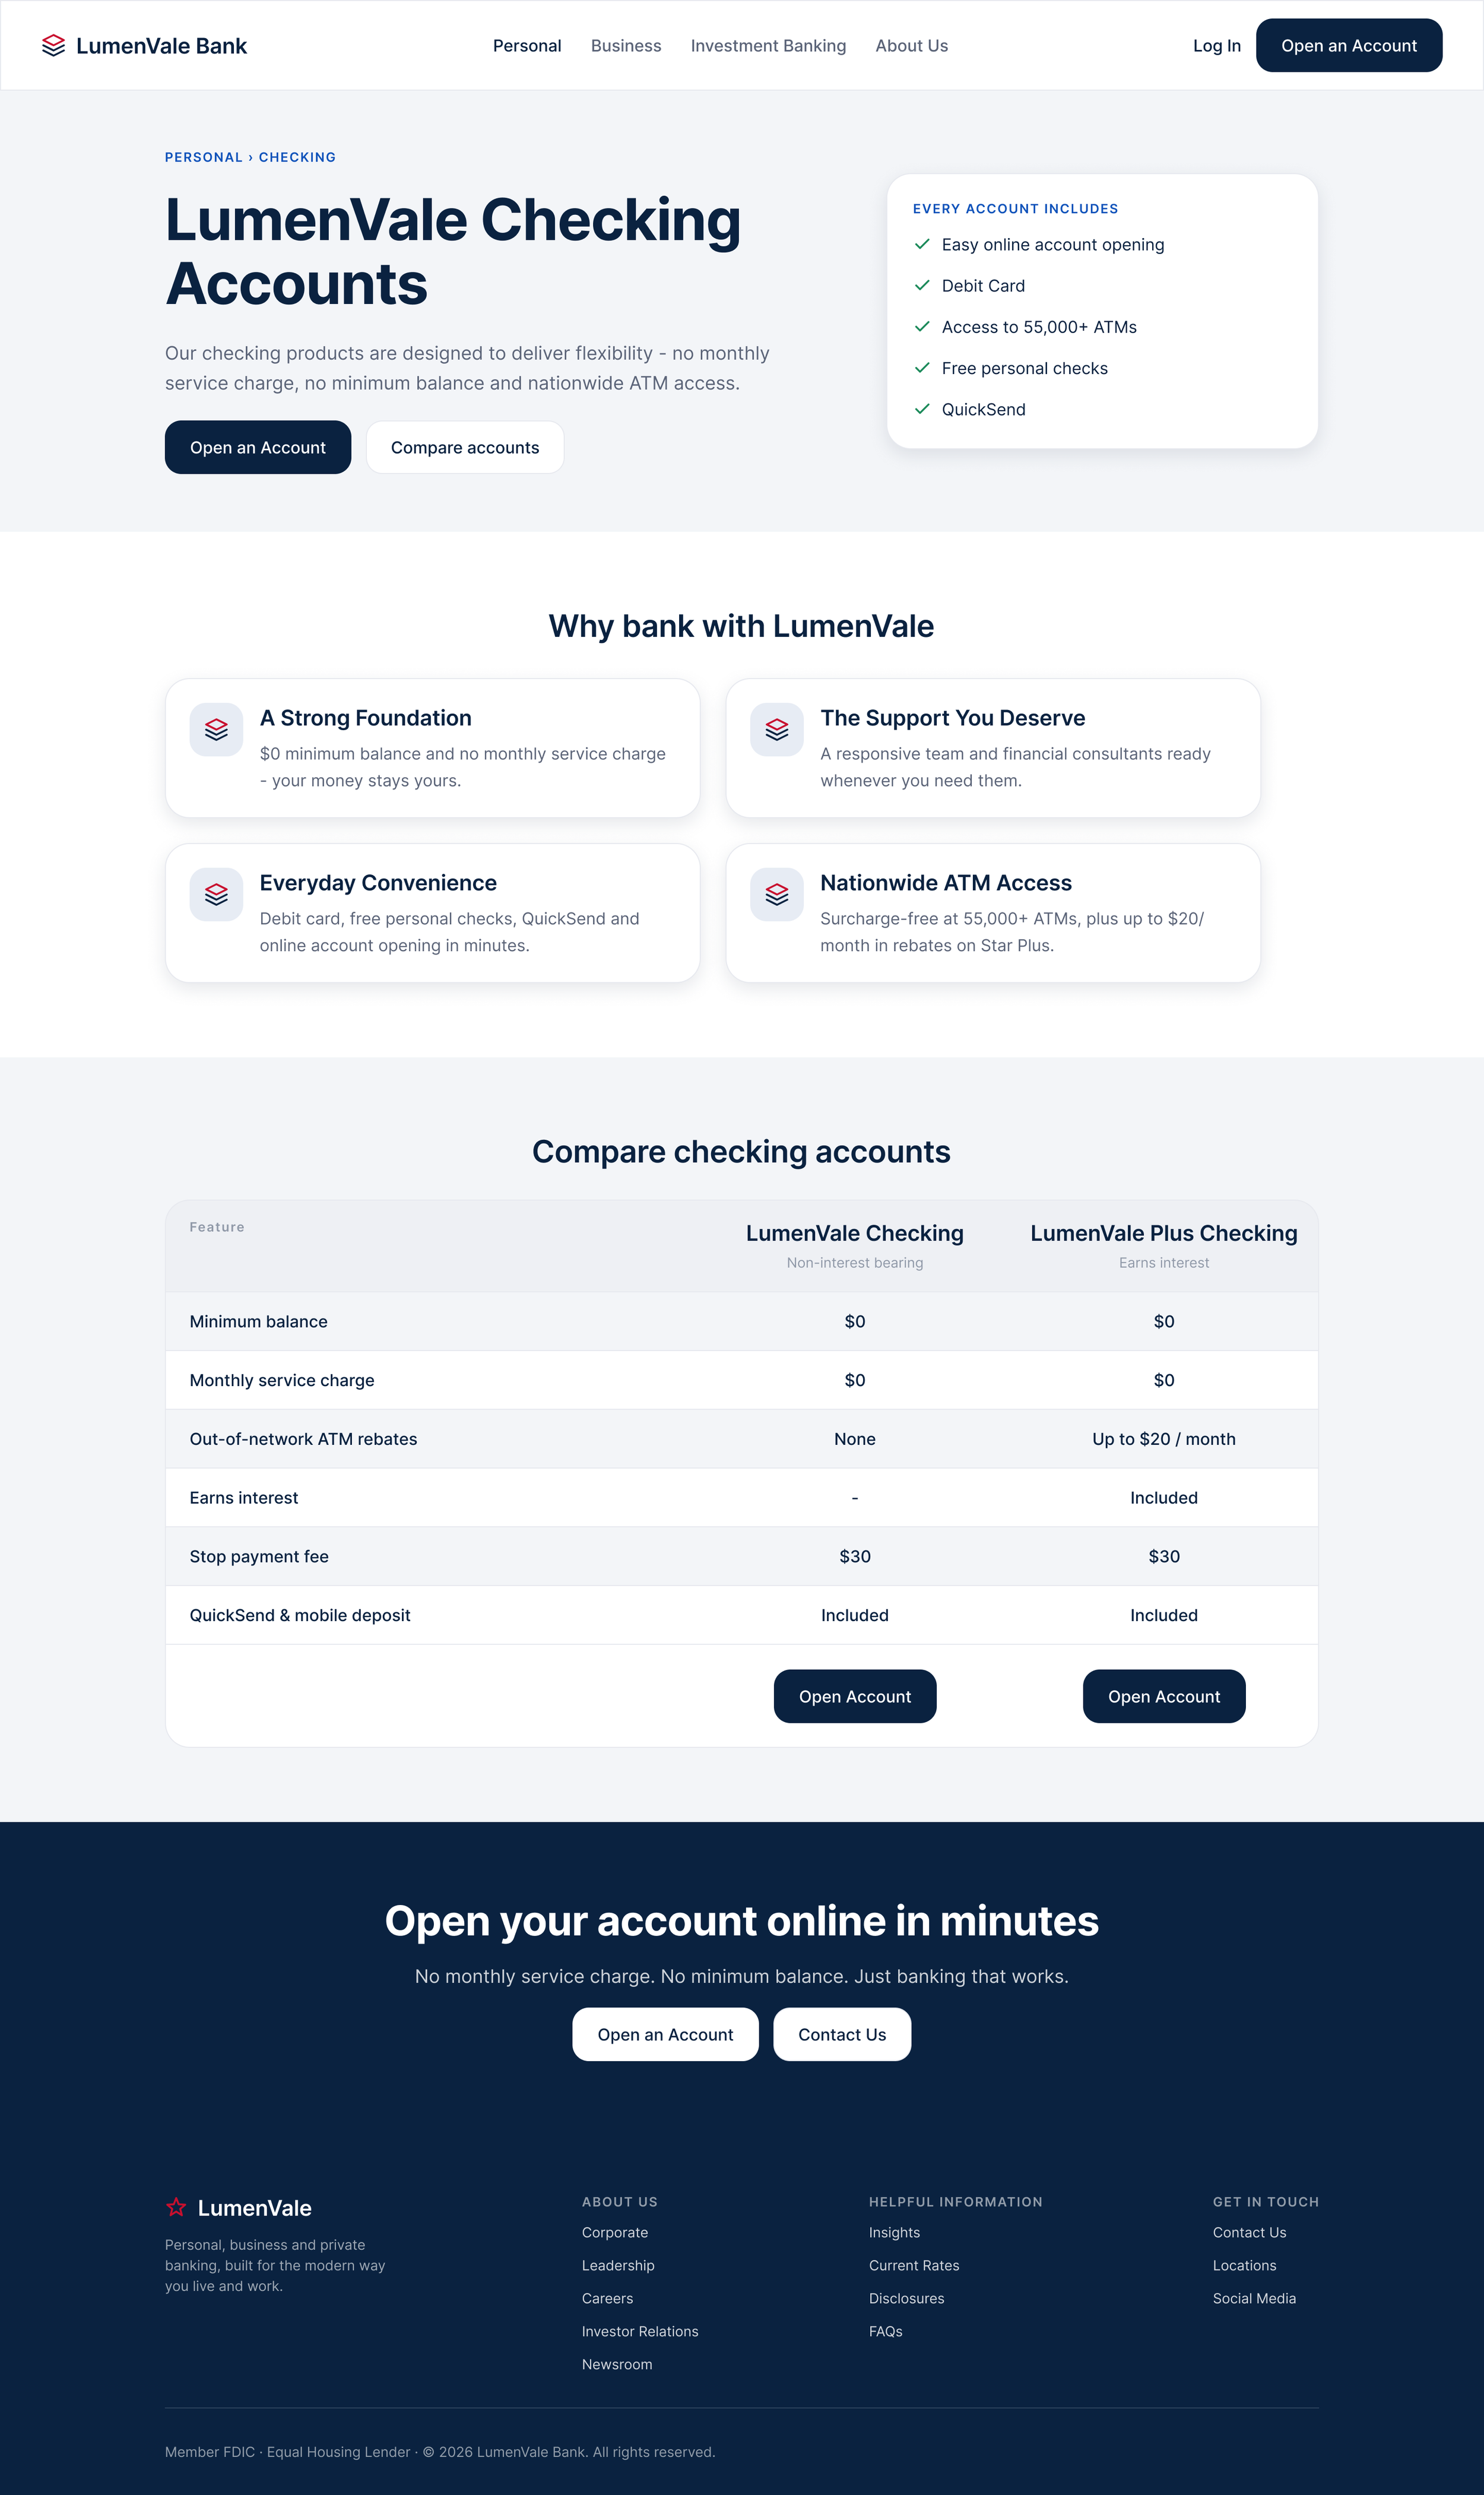
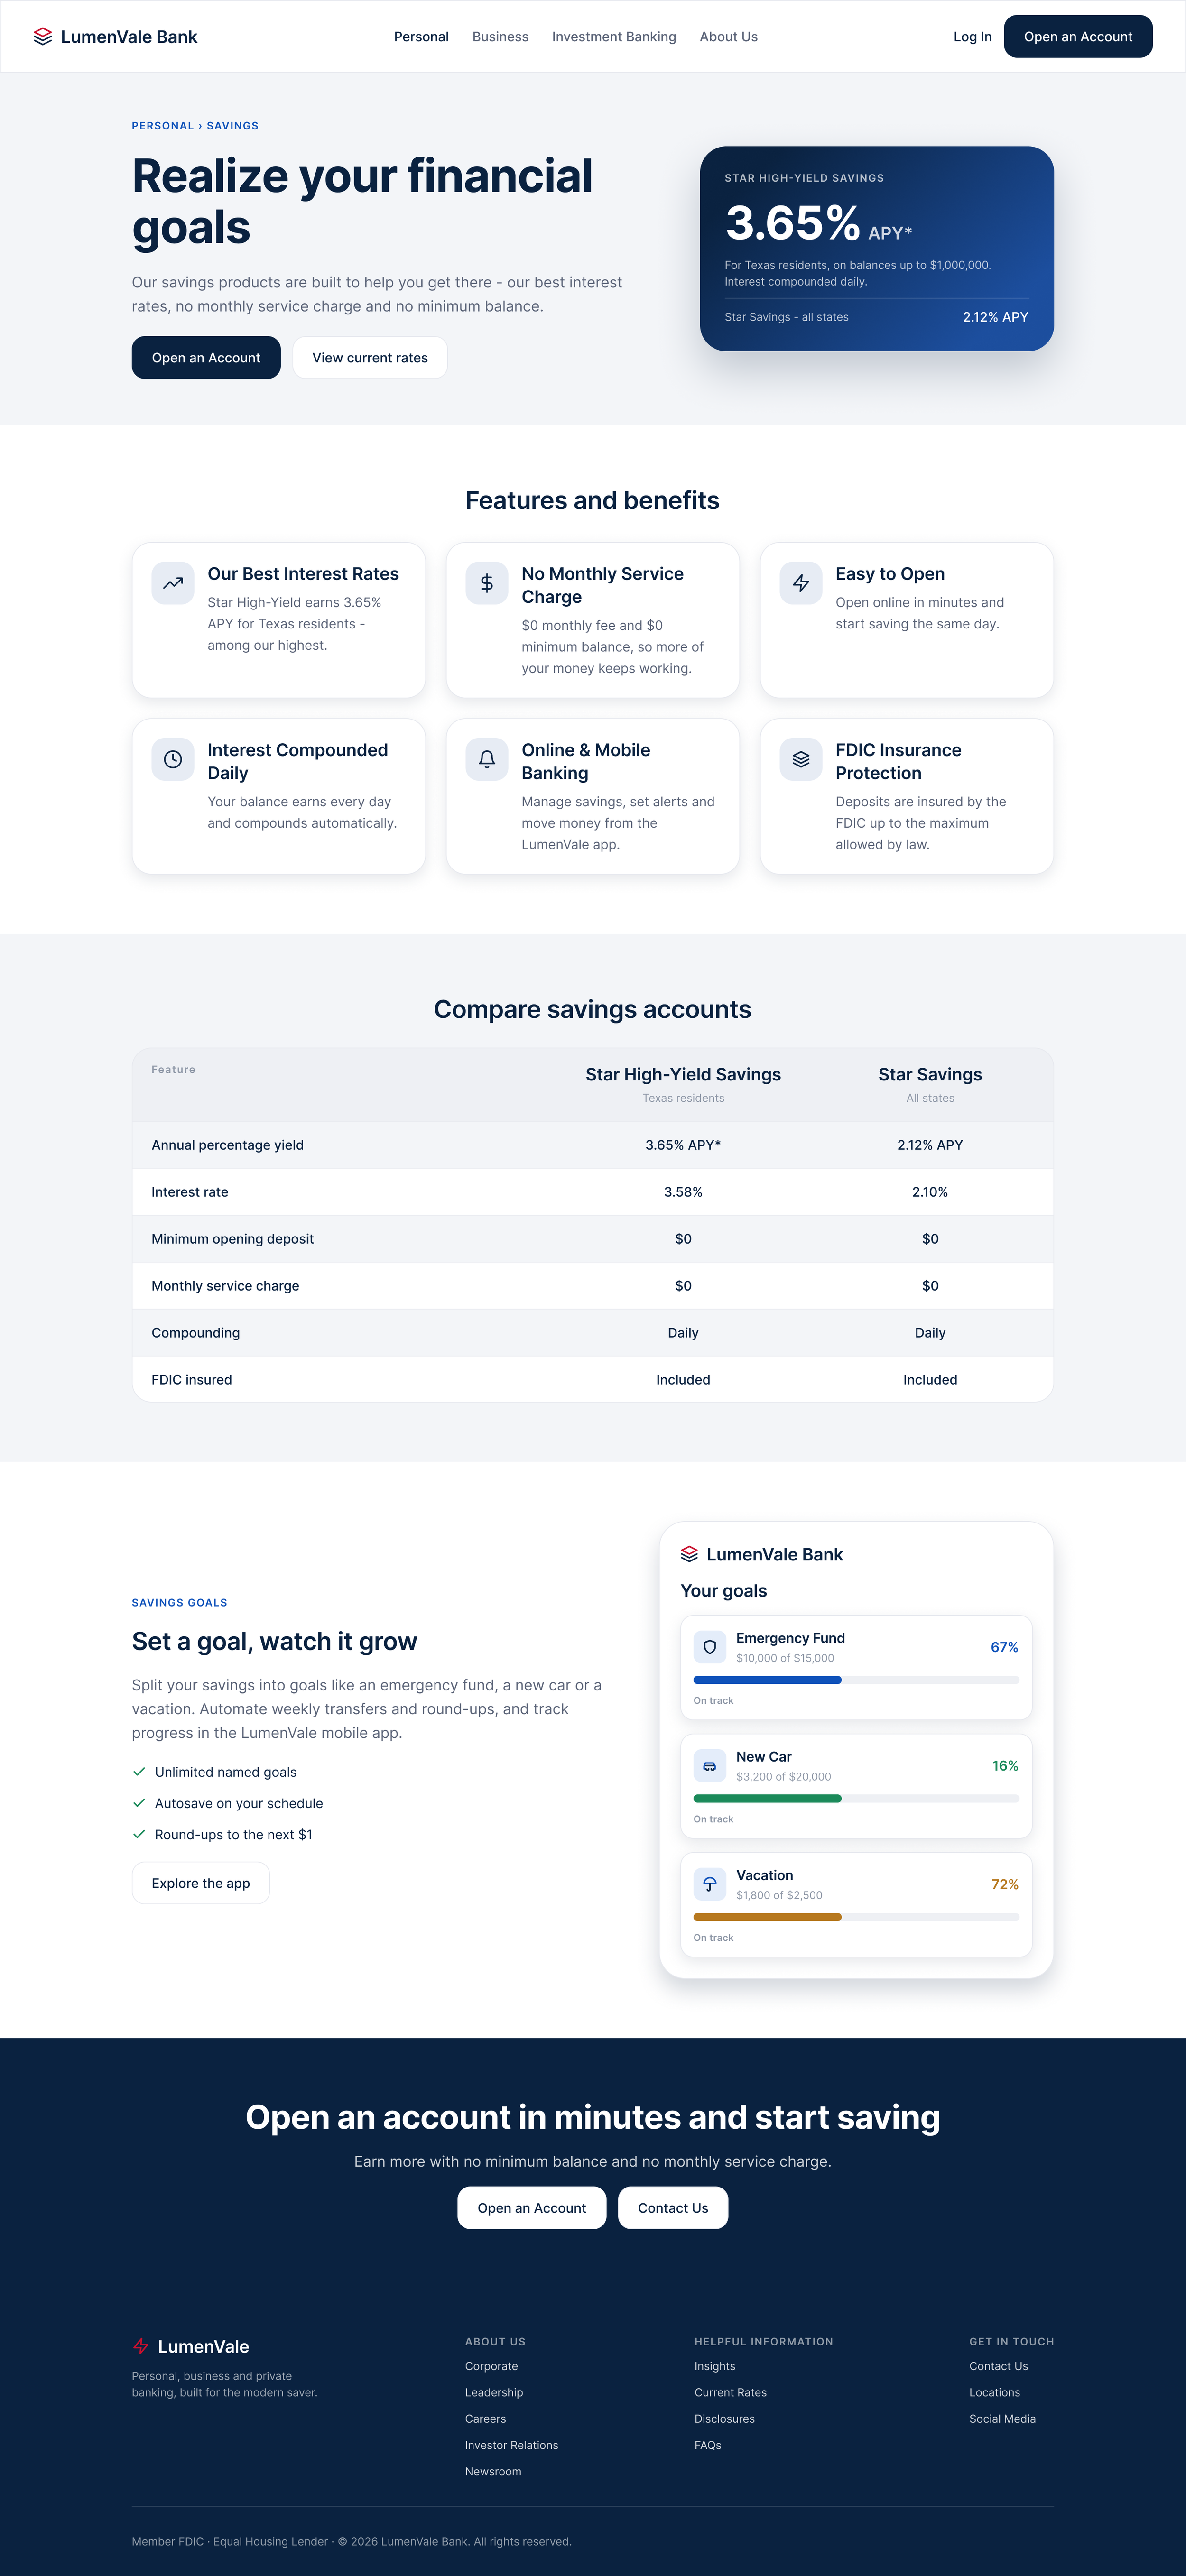
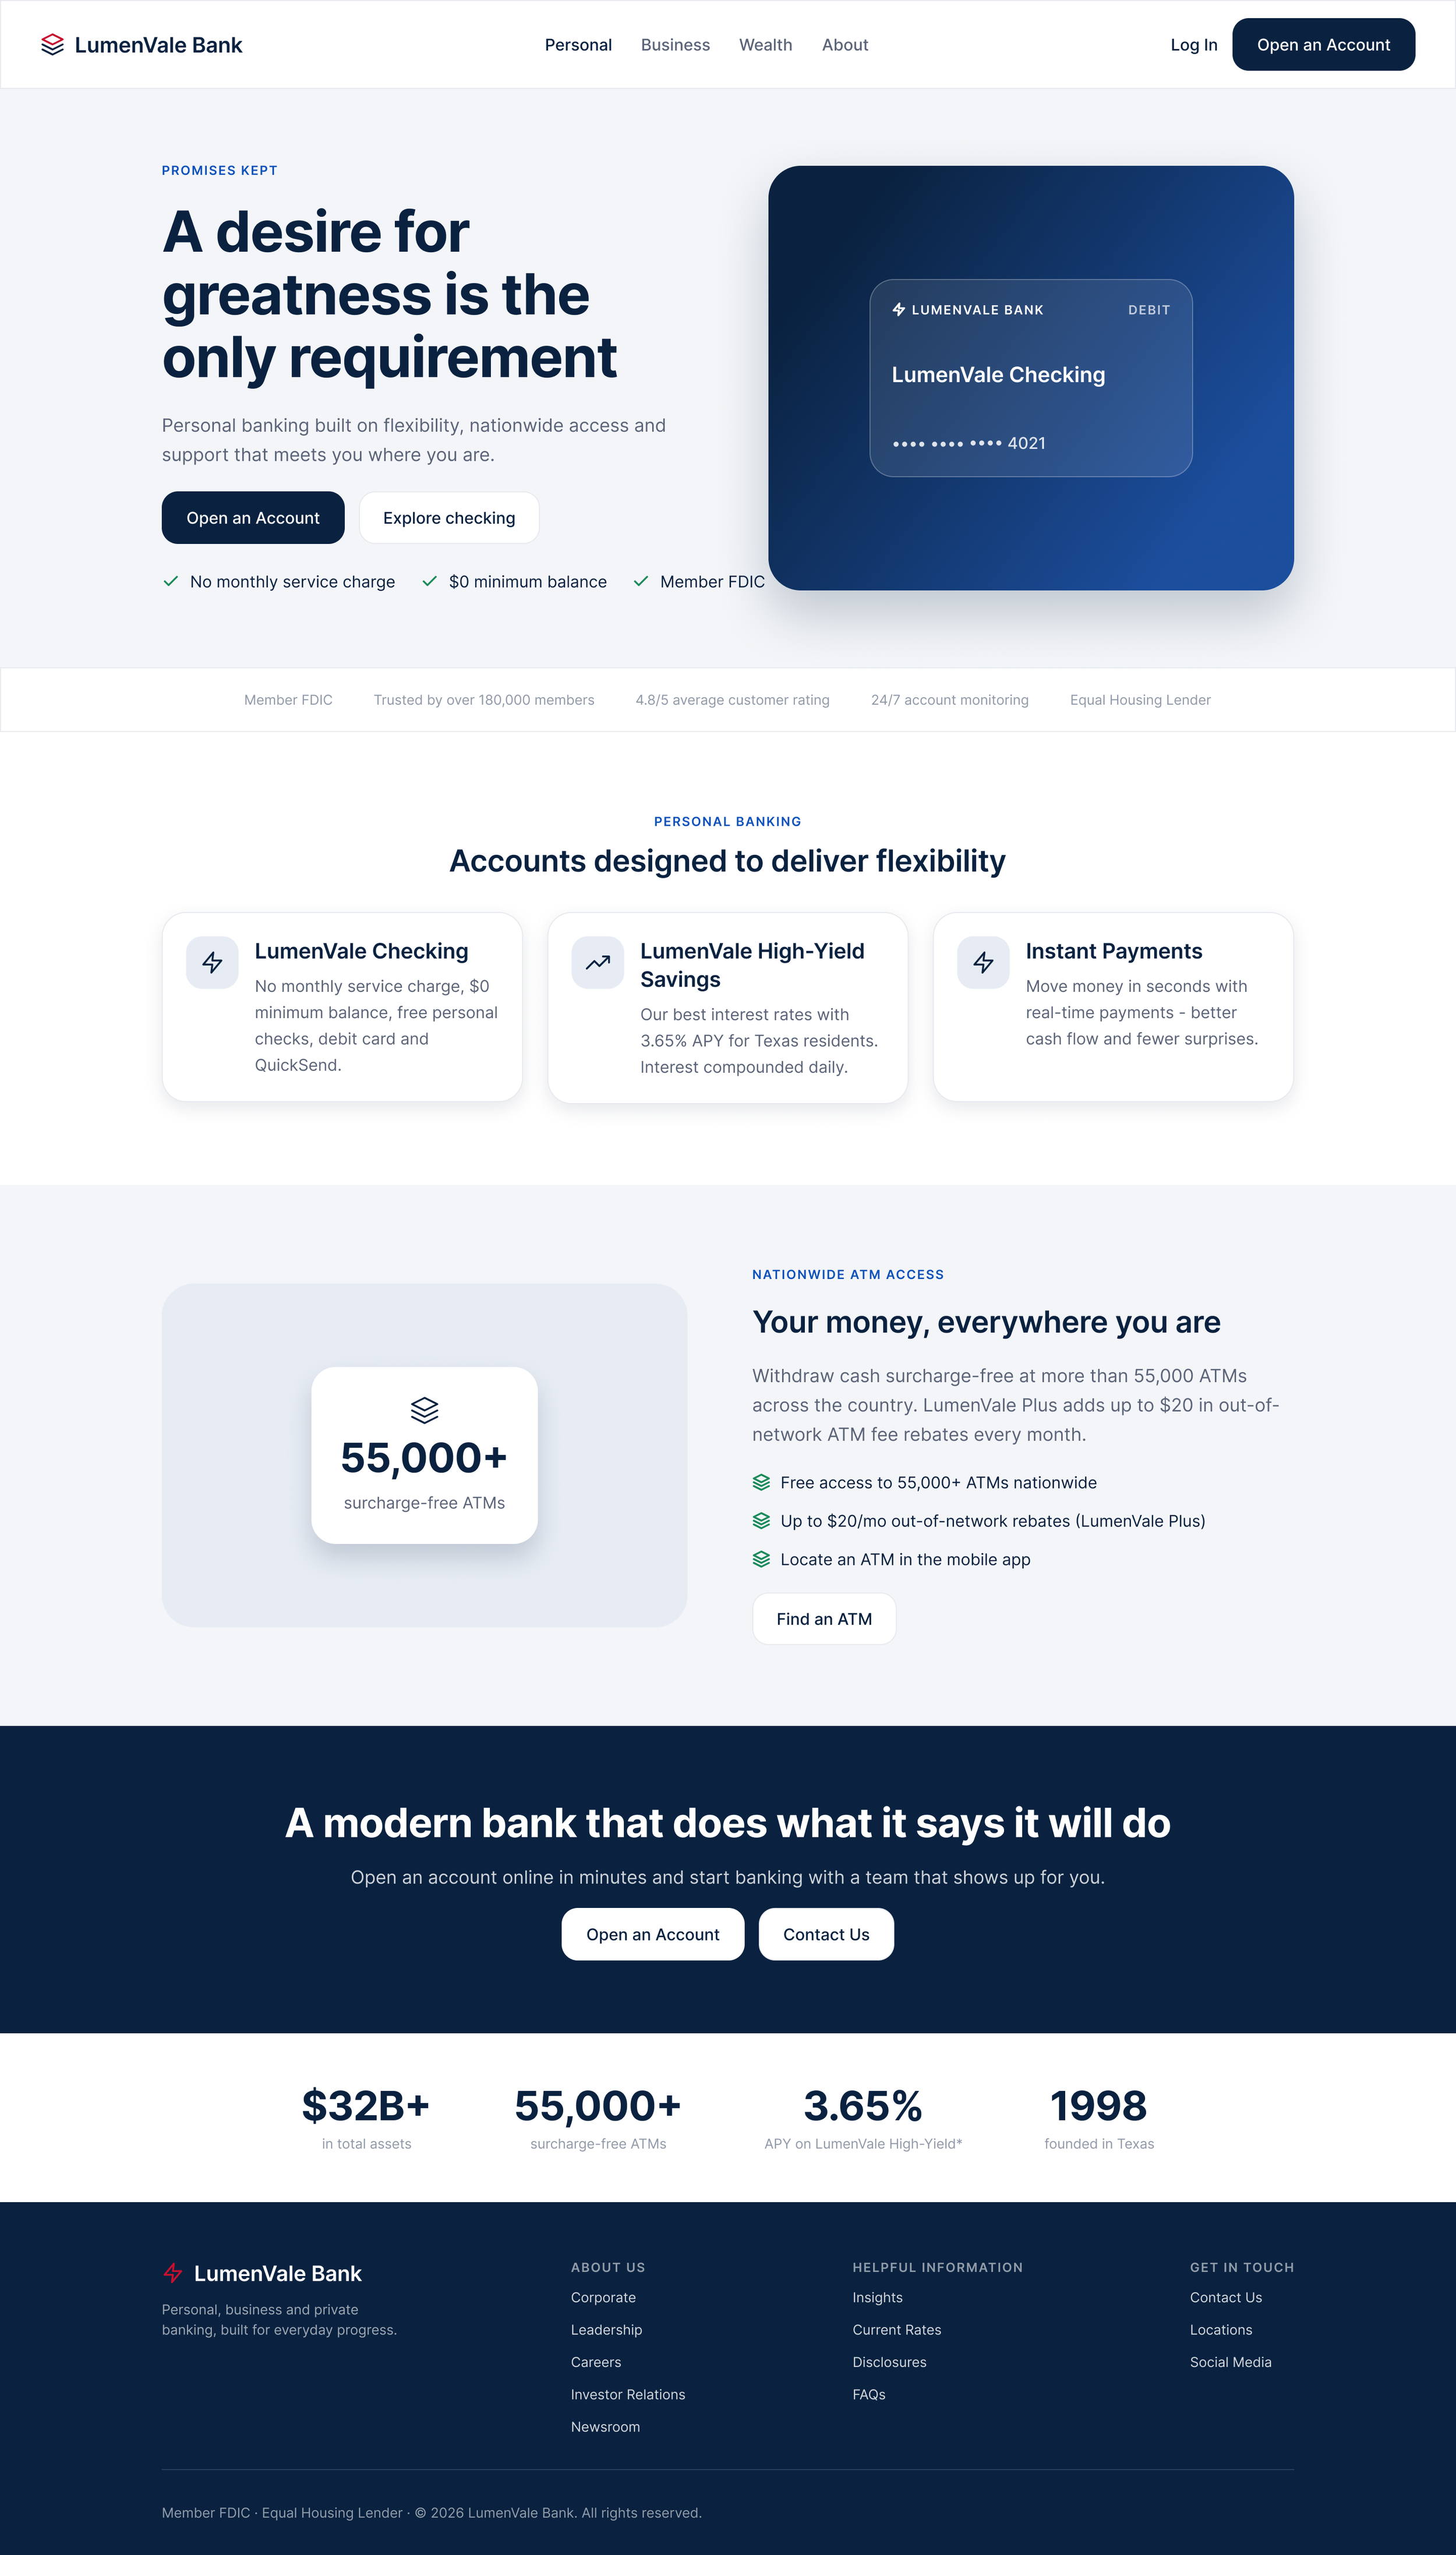
Storefront Screens
3. Build in Figma
I turn the chosen wireframes into real screens using the design system’s components, spacing, and tokens. Claude helps me assemble and adapt them quickly, and the system keeps everything consistent.
4. Refine to high fidelity
I iterate with Claude on the details: visual hierarchy, microcopy, and states like empty, error, and loading. I then do the final visual polish myself.